|
Publisher: Artifex Mundi Developer: Artifex Mundi Release Year: 2014
Grim Legends: The Forsaken Bride is one of my top favorite hidden object games. Gorgeous scenery, a haunting soundtrack, clever puzzles, fun scenes, and an enchanting fairytale story are all topped off with the cuteness that is your little orange kitten helper. Truly a game that hits all the buttons.


Type: Color & Shape Matching
Comment: Swap the flower petals on the necklace until all the shapes and colors line up correctly. Here it is solved.

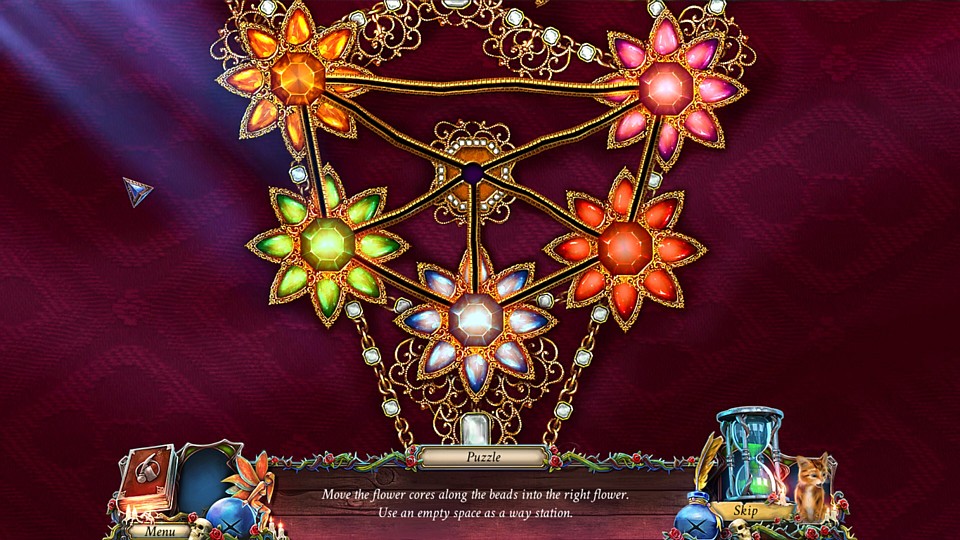
Type: Sliding Tile Node Variant
Comment: Move the gems around the nodes until you get each matched up with the correct color flower. Here it is solved.

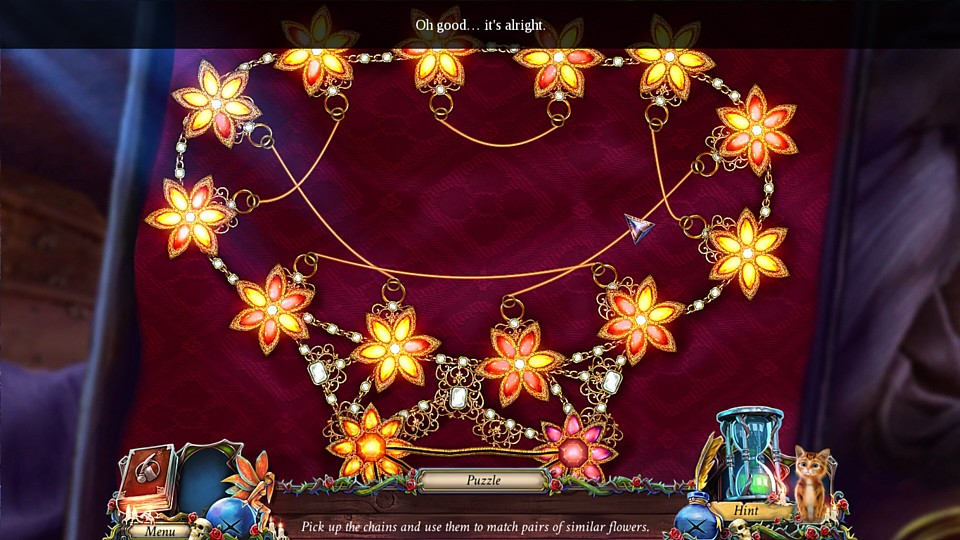
Type: Pattern Matching
Comment: Drag and drop the chain links so that each one links two flowers with the same number of red and yellow petals. Here it is solved.

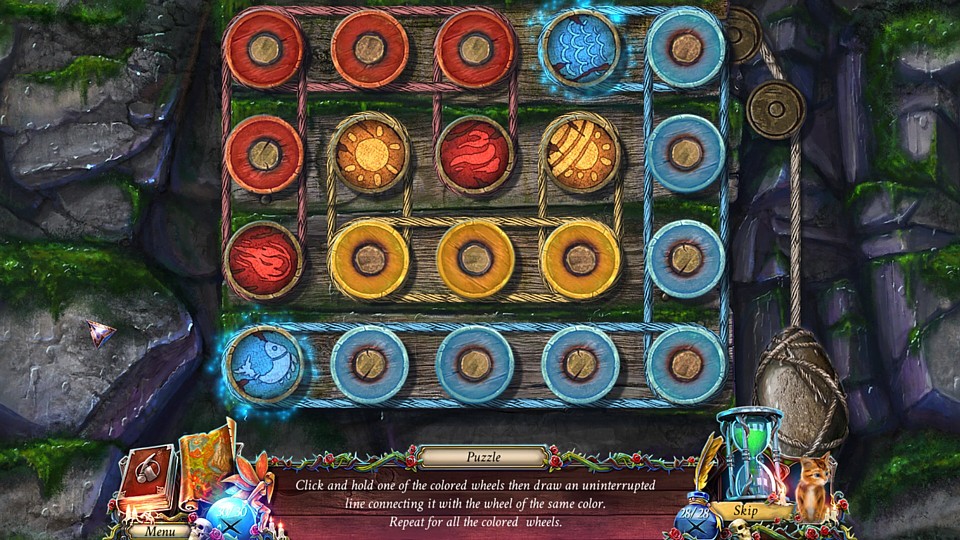
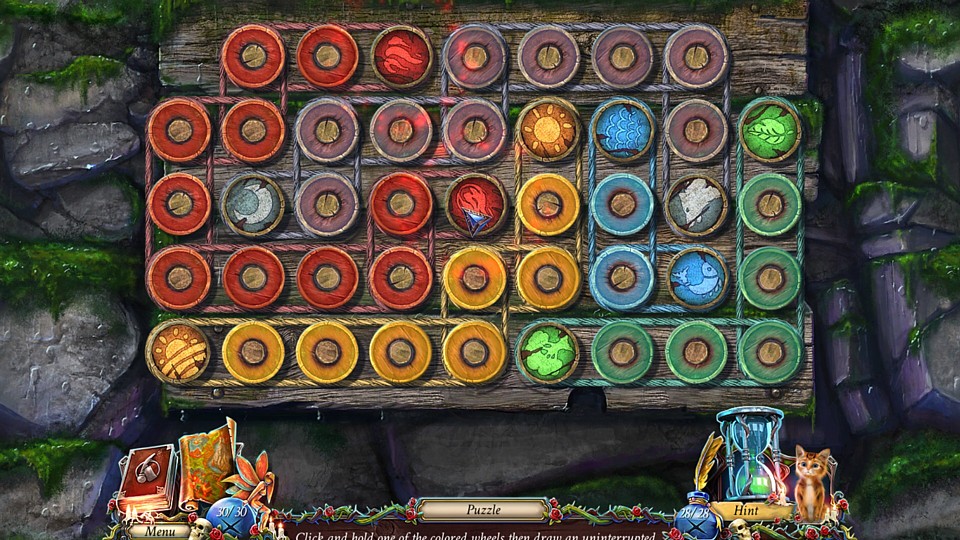
Type: Color Matching Wheels
Comment: Drag and drop a line between two wheels of the same color. The lines must not cross each other. There are three of these total. If you want to see all the solutions, here they are: First, Second, Third.

Type: Concoction
Comment: After placing all the ingredients on the table and lighting the candle with a match, follow the instructions to make the Hunter's Dust.

Start by taking the bowl of honey and pouring it over the candle. Then use the tweezers to put some in the grinder and grind it up.

Wrap the bear claws and pound them with the mallet.

Use the strainer on the berries.

Stamp the wax bear footprint onto the crab shell in the middle.

Referring to the instructions, spoon the appropriate amount of each ingredient into the crab shell. 2 X Honey. 2 X Berries. 3 X Bear Claw. Then mix it up and you're done.

Type: Screen Maze
Comment: For the maze in the forest, shake the Hunter's Dust over the path. If bear tracks appear, go that way. If not, shake it over the other path and go that way instead. Note that you must reveal the glowing tracks before going forward or you'll be sent back to the beginning of the maze.

Type: Mini-Game Shooting Gallery
Comment: Aim at the sandbags with the bow and arrow and shoot at them to let the sand out and lower the drawbridge. The first two are easy. For the third, you'll have to aim through the hole in the bridge. The bridge will lower just enough after shooting the first three to reveal a fourth one that you have to hit by aiming over the top of it. You have unlimited chances, so just keep trying if you miss.

Type: Combination Lock
Comment: After lowering the drawbridge, you're greeted with a mini-puzzle for locked doors with some runes surrounding them. There is a clue for this near the skeleton on a previous screen. You just need to click those runes to open the doors.

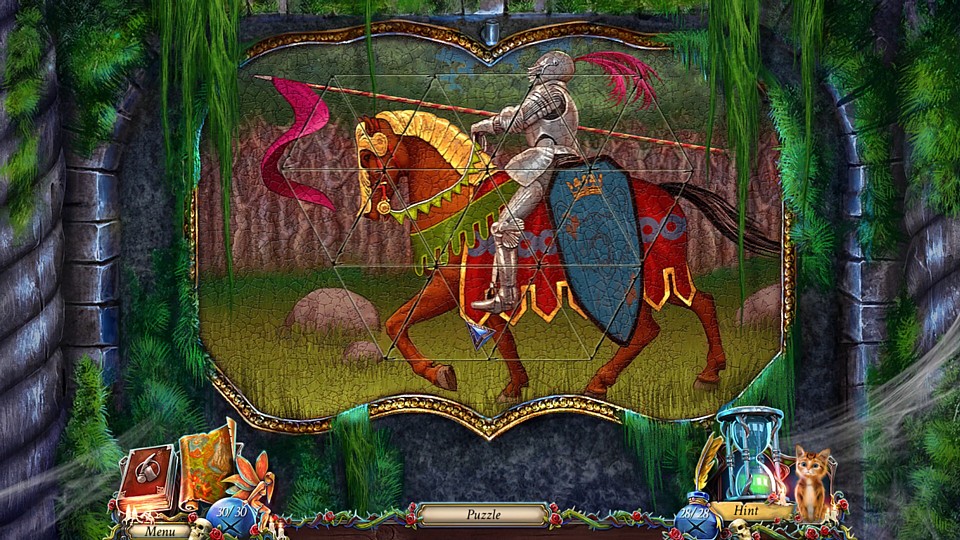
Type: Tile Swapping Picture Puzzle
Comment: Click on two adjacent tiles to swap and rotate them. Try to get all the pieces situated so they form the complete image of a knight on horseback. This isn't very difficult. Here is what it looks like solved.

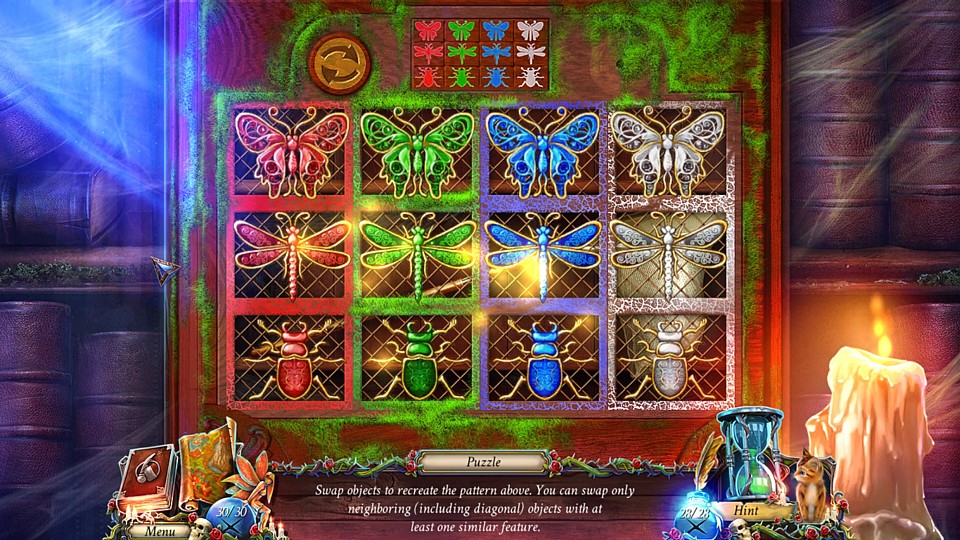
Type: Pattern/Color Matching
Comment: You'll need to arrange the insects the same way as shown in the diagram above them. You can only move them by swapping adjacent insects, and they can only be swapped if they are the same color or the same type of insect. Again, not difficult to do, just takes a little time. Here is what it looks like solved.

Type: Weight Measuring/Concoction
Comment: Start by chopping up the two roots with the knife and the grater. Now you have to measure out each ingredient exactly as the instructions say before putting them in the jar of water.

For the peas, put both the 5 and 2 weights in the left scale.

For the chopped up root, but the 5 on the left and the 2 on the right.

For the powder, put the 2 on the left.

For the leaves, put the 5 on the left.

Type: Rotating Title
Comment: Turn the tiles until all the colored lines match up correctly. Here is what it looks like solved.

Type: Story Sequence
Comment: Click the buttons in the right order to move the story along. For the first one, the correct sequence is: Bucket, Horseshoes, Bell, Rope.

For the second one, it's Corkscrew, Fishing Pole, Slingshot, Lantern.

Type: Screen Maze
Comment: Match the symbols from the clue sheet to the ones on the walls to find the correct path through the maze. First go: To the left, because that's where the X-shaped symbol is.

Next go: To the right, where the N-shaped symbol is.

Next go: Straight ahea, where you see the T-shaped symbol.

Finally go: To the right, under the U-shaped symbol.

Type: Object Assembly
Comment: So you need to make a second flower token out of lead.

Follow the instructions.

Fill the bowl with water from the pump.

Pour the gypsum into the bowl of water.

Put the flower into the gypsum mold.

Put the lead statuette in the ladle and melt it over the fire.

Pour the melted lead into the gypsum mold.

Take it out with the tongs and cool it off in the water.

Use the file to finish it up.

Type: Swapping Tile
Comment: Swap the crow tiles until they're all in their proper spaces and complete the picture. Here is the solution.

Type: Chessboard Puzzle
Comment: Move the knight around in L-shaped patterns until he's visited every tile on the chessboard. No exact solution to this, it's not difficult to do if you just play around with it.

Type: Matching Makeup Colors
Comment: Try to match your character's makeup to that of her twin sister's. Start by using the cloth to wipe the dirt off her face.

This is the correct eyeshadow color.

This is the correct blush color.

This is the correct lipstick color.

This is the correct eyebrow style and that's also what she'll look like with the puzzle completely solved.

Type: Correct Order/Sequence
Comment: There's a very simple puzzle here to open this cabinet door. When you click on the three buttons they show the various stages of a butterfly's metamorphosis. Make the top one a caterpillar, the middle one a chrysalis, and the bottom one a butterfly.

Type: Complete the Picture
Comment: The missing parts of this picture are scattered around within it. Find them and move them to their proper holes. Here is the solution.

Type: Chain Linking
Comment: The red circles are permanent, but the silver circles can be clicked to change the symbol on them. Follow the chains from the red circles to silver circles and change the symbols so that they match on both ends. Here it is completely solved.

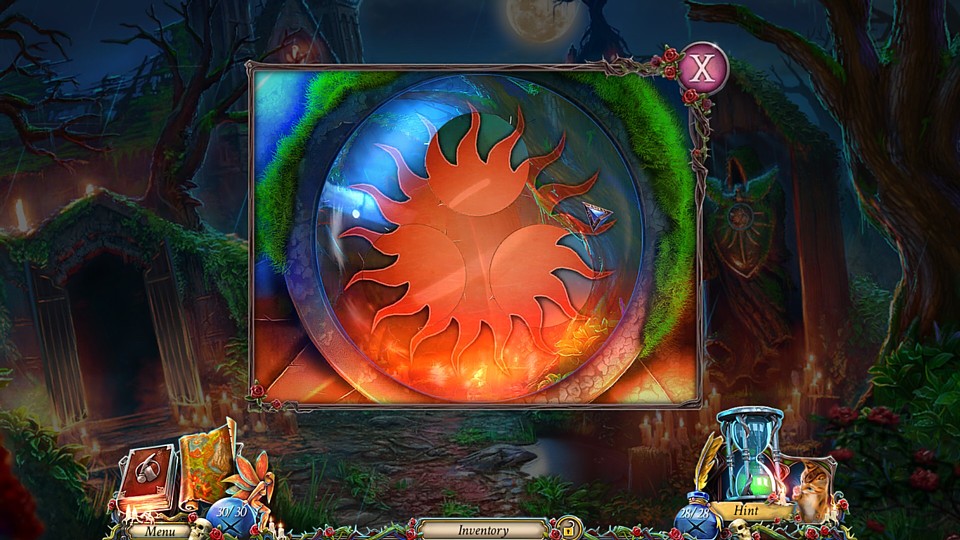
Type: Tile Rotation Picture Puzzle
Comment: Turn the tiles until you get the complete image of a sun. Here it is solved.

Type: Combination Lock?
Comment: I'll be honest, I don't really know what this puzzle is. I just turned the hand in a clockwise manner until it seemed to solve itself.

Type: Light Beam Puzzle
Comment: This is a little more complicated than a typical light beam puzzle because you have to combine the beams to make the right colors. Here it is solved.

Type: Balancing Scale
Comment: Both sides have to add up to 11, so rearrange the numbers. Here it is solved.

Type: Correct Order/Sequence
Comment: Rearrange the tiles of the phoenix's life cycle so they're in chronological order. Here is what it looks like solved.

Type: Jigsaw Puzzle
Comment: This is actually a multiple-step puzzle that starts out as a simple jigsaw. Just put the tiles together to form a picture.

Once you've assembled it, you'll now be asked to rotate the discs to complete the image.

This will make a scrap with runes appear. Find the runs in the image and click on them in the same order as shown on the scrap. Here they are if you're having trouble finding them.

Type: Rune Puzzle
Comment: For the main game's final puzzle, there are three sets of runes and three floating islands in the background with a rune on each that matches the ones above the changeable sets. Change the two runes on each set to form the complete rune that matches the one above it and on the corresponding island. Here it is solved.

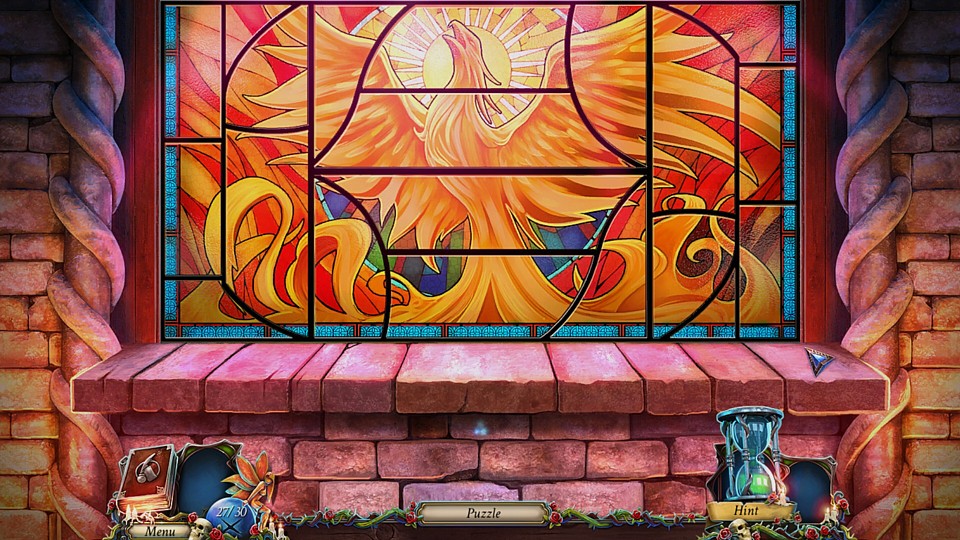
Type: Jigsaw Puzzle
Comment: The first bonus chapter puzzle is a simple jigsaw, just put the stained-glass window pieces where they belong. Here is what it looks like solved.

Type: Complete the Picture
Comment: Click on the tiles to form the image of a phoenix. Here it is solved.

Type: Color Matching
Comment: Rearrange the phoenix's feathers so that each color matches the indents. Here it is solved.

Type: Object Assembly
Comment: Put the griffin together according to the instructions. Here is what it looks like solved.

Type: Matching Objects
Comment: Rearrange the orange objects in this scene so that each statue is holding the two that are most appropriate for their professions. Here it is solved.

Type: Rotating Maze
Comment: Rotate the maze so that the green ball ends up on the green end and the red ball on the red end. This is really easy to do.

Type: Street Light Puzzle
Comment: Place all the eggs around the field so that all paths are lit up. Here it is solved.

Type: Color Matching Wheels
Comment: Rotate the outer wheels so the colors on the inner wheels eventually match. Here it is solved.

Type: Swapping Tile Puzzle
Comment: Swap the tiles to form the complete image. Here it is solved.

Type: Gear Fitting Puzzle
Comment: Place the gears properly so that they form and chain and start turning. Here it is solved.

Type: Correct Path/Pattern Matching Puzzle
Comment: Using the clues above, follow the correct path from the key to the keyhole. Here is the solution.

Type: Swapping Tile Puzzle
Comment: Swap the tiles to get a complete picture. Here it is solved.

Type: Rotating Rings Picture Puzzle
Comment: Rotate the rings to get the complete image of a skull. Here it is solved.

Type: Rotating Tile Picture Puzzle
Comment: Rotate the tiles to get the complete image. Here it is solved.

Type: Tile Matching Pairs
Comment: Click on two tiles that have the same rune pattern on them, and they will disappear.

When you've eliminated all the matching pairs, you'll be left with two that your character will write down. Repeat this three more times. (I'm not showing all of the solutions because this is too easy.)

Type: Swapping Tile Puzzle
Comment: The final puzzle is a simple tile-swapper. Form the complete image of a demon's face on the parchments. Here it is solved.
|


