|
Publisher: Strategy First Developer: Gogii Games Release Year: 2012
Paranormal investigator Scarlet Frost is summoned by the eccentric Dr. Corvus to a remote castle dwelling to confirm if an ancient artifact said to house the soul of demon is real. For some strange reason, she says it's fake, which sets off a chain of events that unleashes the demon. Frost must now exorcise the demon to save the soul of Dr. Corvus's daughter and discover the secrets of her own past...which make little sense, but hey, it's Theatre of the Absurd. This HOG has a unique horror-themed atmosphere, and Frost's ability to gain special demon powers in her arm allow her to unlock the castle's many secrets.


Type: Rotating Rings Picture Puzzle
Comment: Rotate the rings to form the complete picture of a face. Some rings affect others when turned and some turn independently. Here is what it looks like solved.

Type: Rotating Parts Puzzle
Comment: When you click the glowing blue rings, they rotate and the elemental rings swap places. The elements must be arranged in a particular order, according to a clue you'll find that gets recorded in your journal. Here is what it looks like solved.

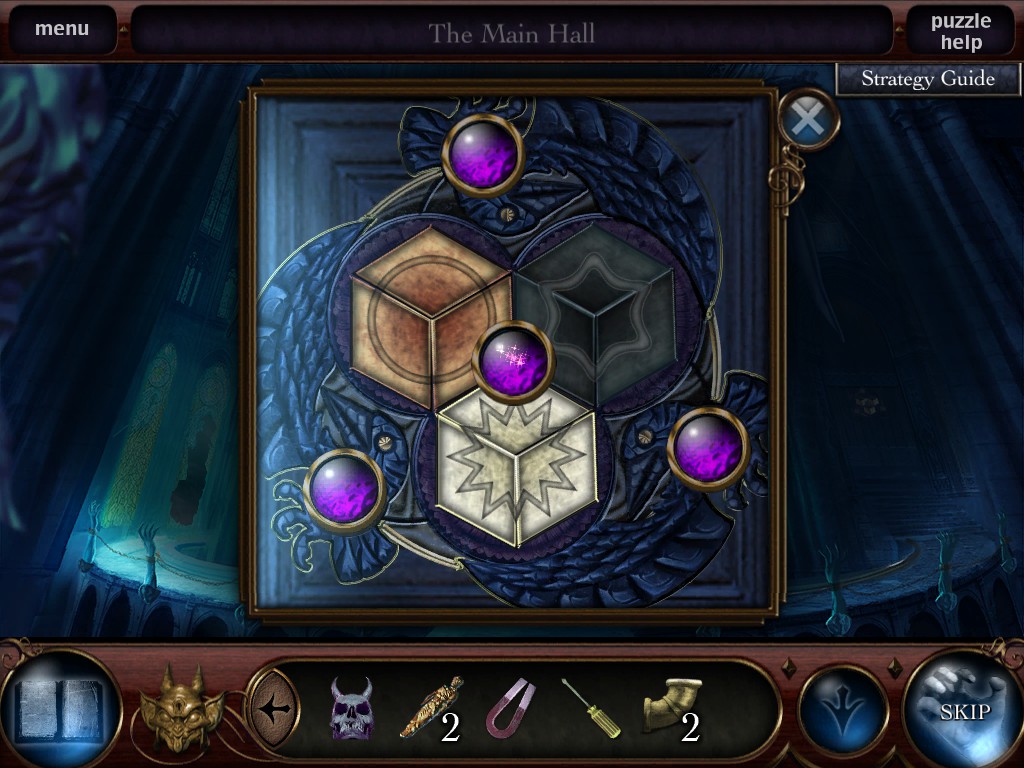
Type: Rotating Parts Puzzle
Comment: When you click the purple buttons, the corresponding pyramids will rotate. You can swap their parts by clicking the purple button in the middle. A clue you find for your journal will tell you how the patterns must be arranged to solve the puzzle. Here is what it looks like solved.

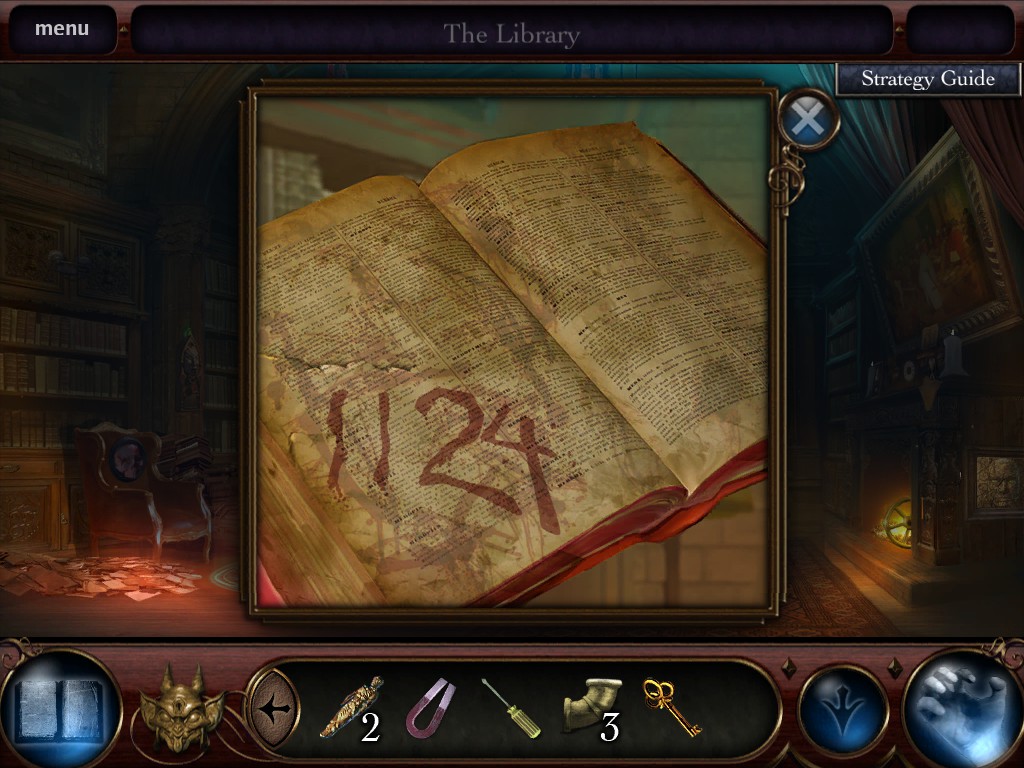
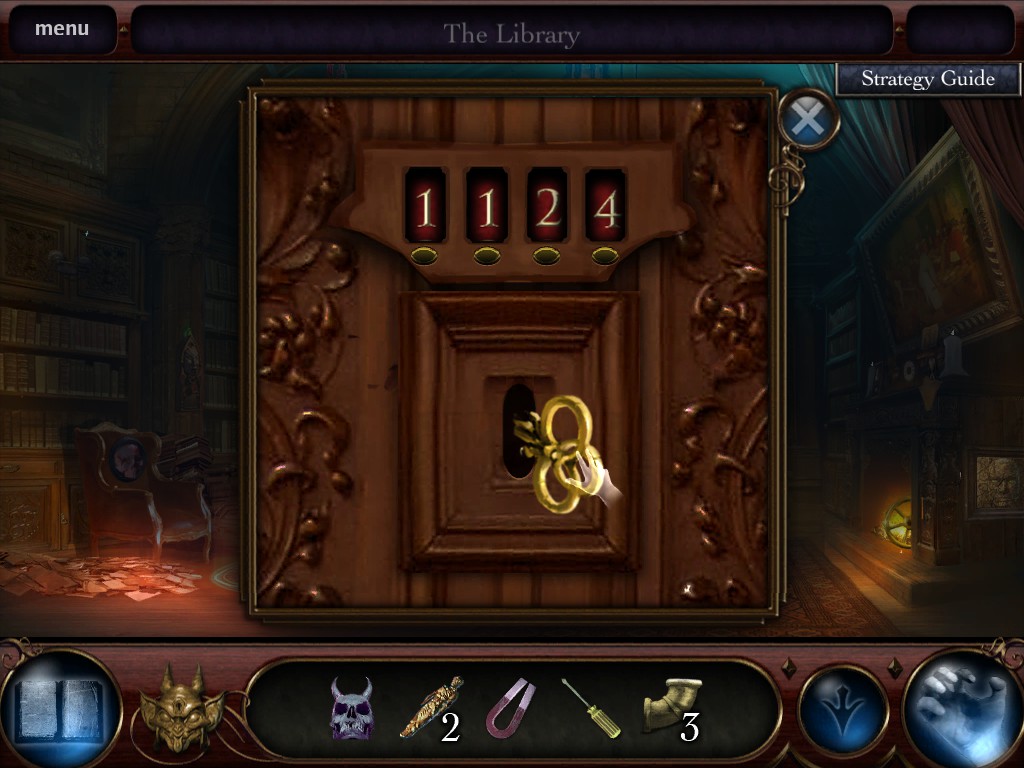
Type: Combination Lock
Comment: Technically not considered a puzzle by the game's logic, but I'll include this anyway. The combination for this lock can be found on a piece of paper nearby. Don't forget to use the key after you've entered it.

Type: Pipe Connecting Puzzle
Comment: For this puzzle you'll need to connect a series of pipes to fix the boiler. My screenshot for the first part shows it solved. This is the easiest one.

The second part is far more complicated. Here is what it looks like solved.

The final part is the most complicated of all, but not really much harder than the second. Here is what it looks like solved.

Type: Jigsaw Puzzle
Comment: Put together the pieces of the child's drawing. Here it is solved.

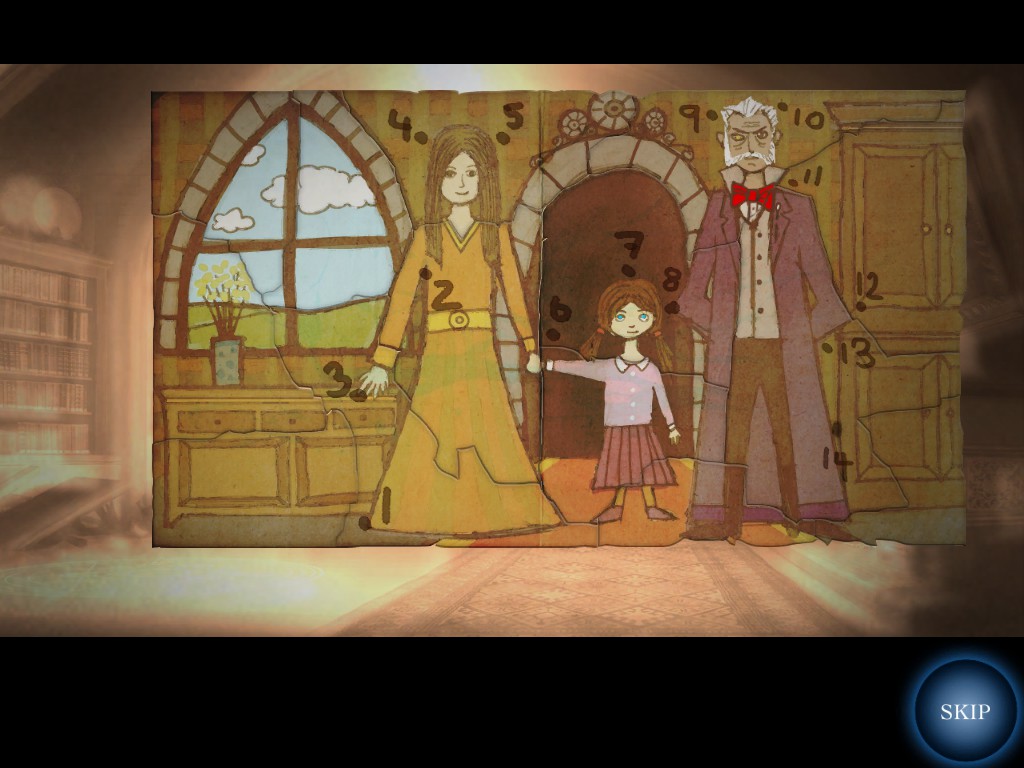
Type: Connect the Dots
Comment: Strangely enough, you'll now be asked to connect the dots on the drawing. Just, uh, click them in order.

Type: Tile Rotation Picture Puzzle
Comment: Rotate the tiles to form the image of a crow. Some tiles affect others, and some move independently. Here is what it looks like solved.

Type: Telescope Puzzle
Comment: When you get the telescope functional again, look for the star at coordinates 12 and 3, then hit the Go button to zoom in on it. Here it is solved.

Type: Swapping Tile Puzzle
Comment: Clicking on a Zodiac button will swap it with its neighbor. All you have to do is match each button to the symbols on the central screen. I don't have a "solved" screenshot because it transitioned too quickly on completion, but I don't think we really need one. It's self-explanatory.

Type: Combination Lock
Comment: The nearby intercom gave you a clue for this puzzle. The demon's words were "Joy and Sadness, Fear and Rage". Note the facial expressions on the masks. Click "Joy" (bottom), then "Sadness" (top), then "Fear" (3rd down), and finally "Rage" (2nd down).

Type: Jigsaw Puzzle
Comment: Find pieces of the mirror and reassemble them here. Here is what it looks like solved.

Type: Tile Rotation Picture Puzzle
Comment: This is nearly identical to the crow puzzle from earlier, only now it's a picture of Bethany. Some tiles affect others and some move independently. Here is what it looks like solved.

Type: Jigsaw Puzzle
Comment: Reassmble the Hapsberg Cube. Here it is solved.

Type: Matching Parts
Comment: Not sure if this is really a puzzle or not, but I'll include it. You'll find a bunch of canopic jars with body part symbols printed on them. They go in the holes in this wall, but they must be matched up properly to the drawing. Each hole has a line going from it to a part of the woman. For example, the jar with the eye would go in the hole whose line extends to the drawing's eye. My screenshot has it almost completely solved if you're confused.

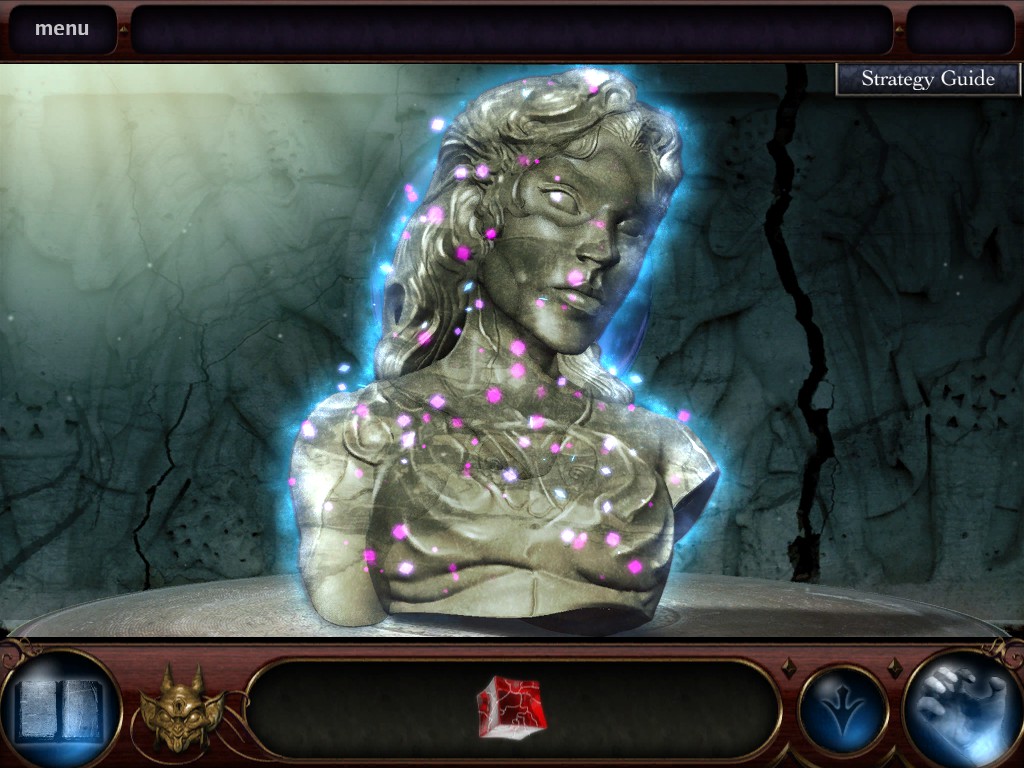
Type: Jigsaw Puzzle
Comment: Reassemble the bust as the example picture shows. Here it is solved.

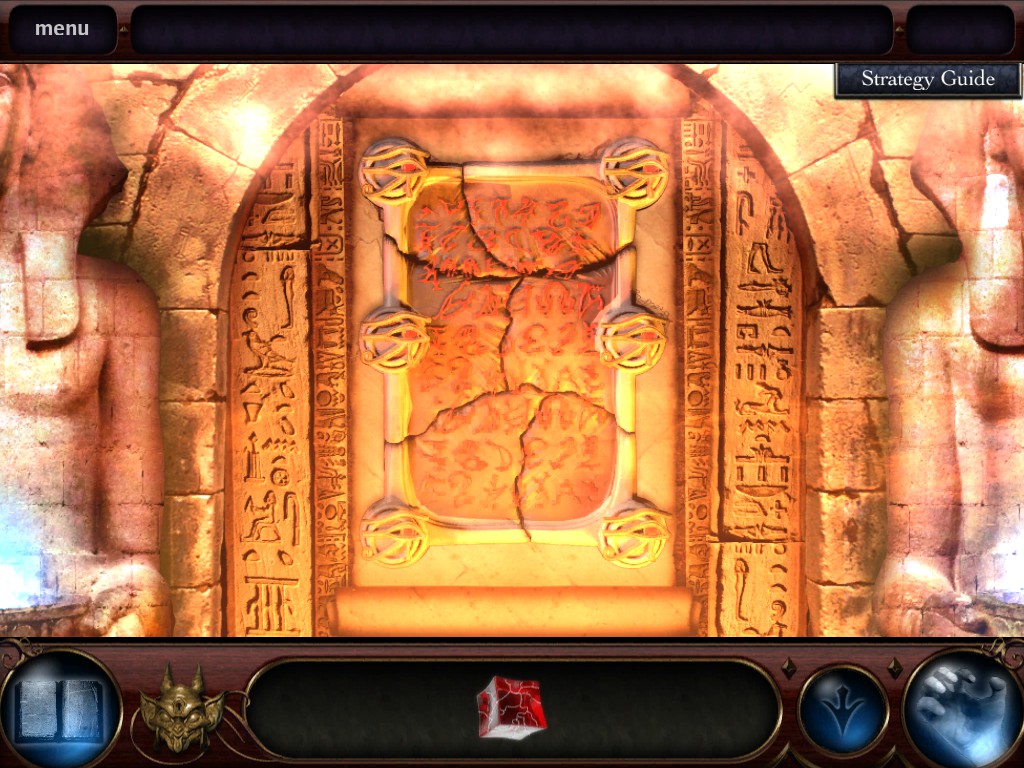
Type: Jigsaw Puzzle
Comment: Put the broken pieces of the tablet together in this wall. My screenshot has it mostly solved. Here it is completely solved. That's the last puzzle of the main game.

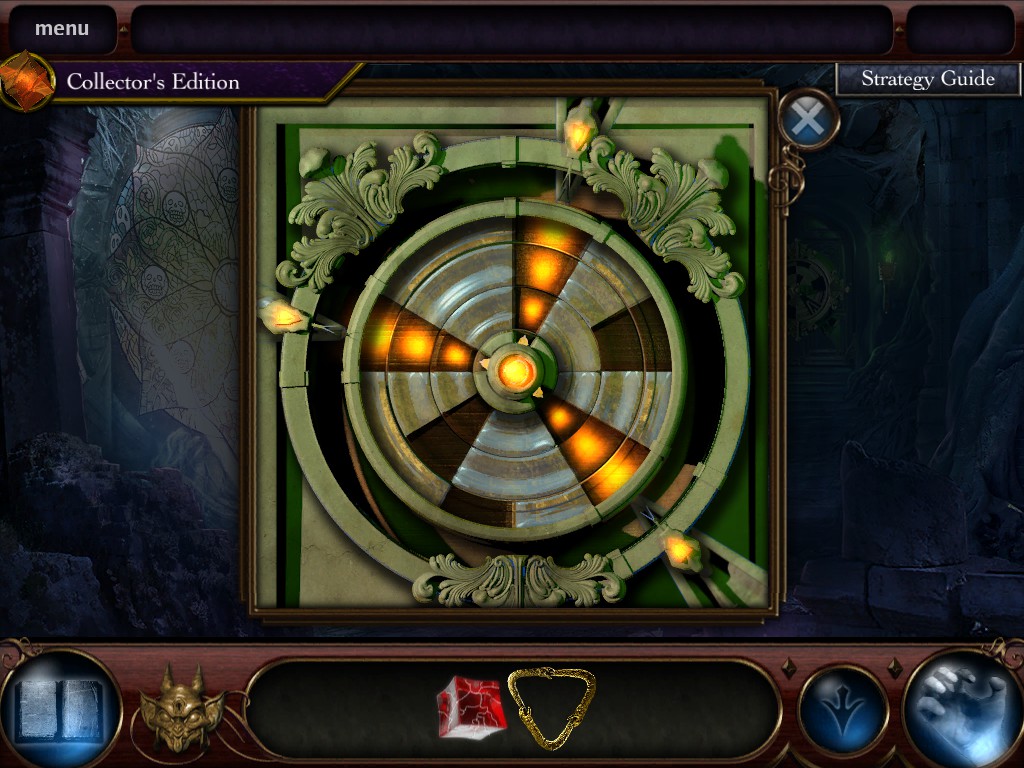
Type: Rotating Rings Puzzle
Comment: The bonus chapter's first puzzle. Rotate the rings so that the openings form paths for all three snake heads. Here it is solved.

Type: Concoction
Comment: You will need to make a crystal paste that can fix the broken Hapsberg Cube.

There's a set of instructions on the table. Dr. Corvus's voice will also come out of nowhere and guide you through the steps.

Start by taking the red crystals and putting them in the mortar. Grind them into a red powder with the pestle. Use the valve from your inventory on the faucet and turn on the water. Put the red powder in the water basin. Take the oil decanter and use it on the water. Then take the brown sifting bowl and use it on the water. Put the winged Egyptian figure from your inventory in the indented area in front of the burner. This will turn the burner on. Take the sifting bowl and put it on the burner. Put the Hapsberg Cube on the pedestal in the middle of the table. Use the sifting bowl on the cube. It is now repaired.

Type: The Bucket Problem
Comment: While bucket problems are a common HOG puzzle, this one complicates things by way of its turning parts that you need to utilize to fill and drain the chambers. See the arrow pointing to that row of stars on the left chamber? The water must fill to that line.

Start by connecting the valve to the left chamber and filling it. Then click the arrow on the bottom of the left chamber to transfer the water to the right chamber. This puts 3 units in the right and leaves 2 units in the left.

Drain the left chamber.

Refill the left chamber.

Transfer the water from the left chamber to the right chamber again. Because there is only room for one unit on the right, only one unit will drain, leaving you with 4 units on the left, which is what you need.

Type: The Bucket Problem
Comment: Although it uses electrical currents instead of liquid, this is another bucket problem. It's harder to figure out than the previous one. The arrows on the console at the bottom left activate the arrows around the device. Pulling the lever will send a current through the arrow that is currently lit up. The electrical charge on the big dome to the left must be at the center line where the green lights are. Start by turning on the arrow that's connected to the cable that goes to the dome, as in the screenshot.

Pull the lever and the dome will be completely charged to the top. Highlight the arrow on the cable that goes from the dome to the chamber on the right.

Pull the lever and the charge will transfer to the right chamber, leaving you with 3 units in the dome.

Activate the arrow on the right chamber that's on the exposed cable. Pull the lever and the chamber will decharge.

Transfer the 3 units from the dome to the chamber. Then recharge the dome again.

Transfer the units from the dome to the chamber. This leaves you with 7 units in the dome.

Empty the chamber again.

Transfer the energy from the dome to the chamber again. This will leave 1 unit in the dome.

Empty the chamber again.

Transfer the single unit from the dome to the chamber. Then recharge the dome again.

Transfer the energy from the dome to the chamber. This will (finally) leave you with 4 units in the dome, which is exactly what you need.

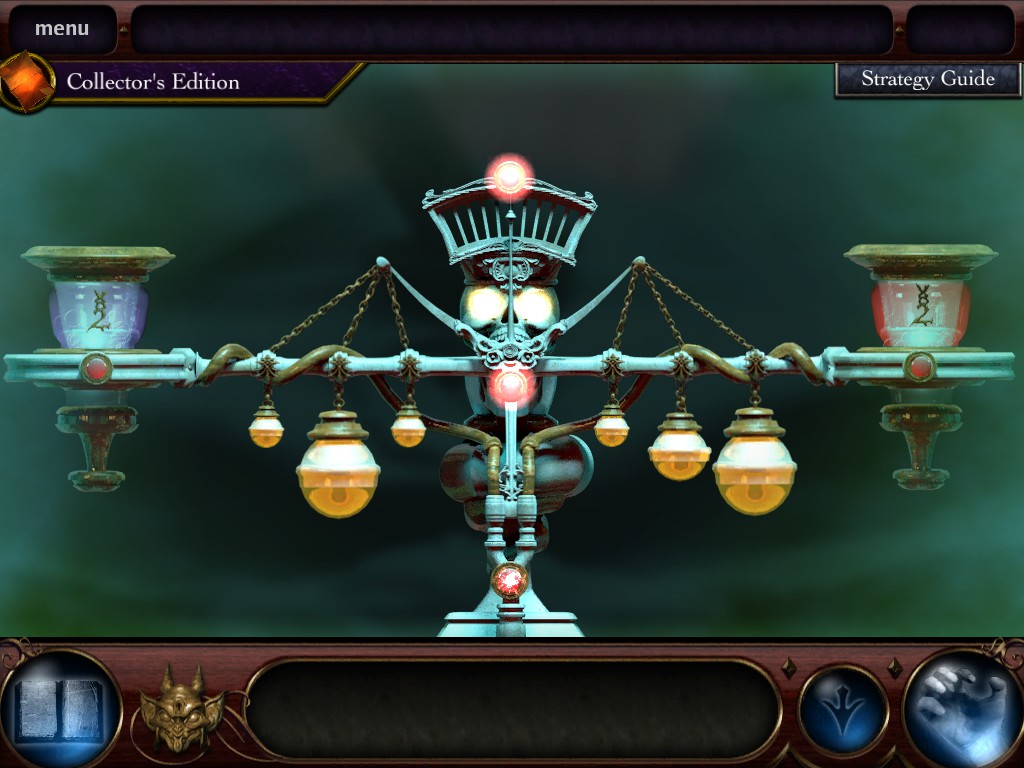
Type: Weight Balancing Puzzle
Comment: After all that, the bonus chapter's final puzzle is quite simple. Just balance the weights via trial and error. Here it is solved.
|


