
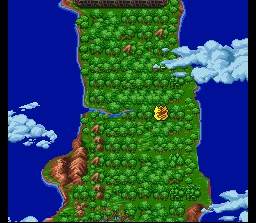
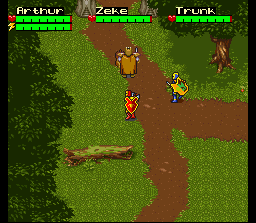
  1. Merlin will now send you on a quest to find the missing pieces of the Staff of Rhiothamus and to recover Zeke's and Trunk's Keys of Truth from the castles Blackroot Keep and the Dark Citadel. He will give you one Piece of Staff (1). You must find the other five. Go to the Round Table and put Zeke and Trunk in your party. Then leave the castle and open up your map screen. Move the shield to the farthest northeast corner you can possibly warp to, and then move it one square to the left of that (first screenshot). When you warp, you'll end up in the forest surrounding Castle Vilor. At the top of the screen to the left is a gate that previously would not let you pass through it. Go through that gate to the next screen.  2. You'll end up in a forest that looks like it's in the fall season. Take the first path you see going north and keep following it north all the way up to the top of the screen. The path splits into two going north off the screen. Take the lefthand one.  3. Keep going north along the path. The trail will end at a group of bushes and fallen logs, but just keep pushing north. Eventually you will come to a swarm of birds and bees surrounding a loaf of Bread. Kill all the enemies and get the bread.  4. From where the bread was, start going northwest and then follow the trail west all the way as far as it goes, and leave the screen going west. When you come to the next screen, you should immediately see a Piece of Staff (2) lying under a tree. Kill all the warlords that appear and get it. NOTE: There is a glitch in the game that sometimes causes this staff piece to not show up. It has something to do with the password you got for starting this part of the game. If your password does not match the one on the previous guide page (Gallop, Woman, Lady, Gallop, Zeke) and this staff piece does not show up, you will need to redo the previous quest. Make sure you get all the missing shields in that quest so that your password will match mine. (Or you could just plug in that password if you don't mind cheating a little.) Without this staff piece you cannot complete the game, so you MUST get it to show up. UPDATE ON THIS GLITCH 7/15/06: According to forum member, BJ Strykes, the glitch that causes this Staff Piece to not show up usually does not happen when you first get here. The glitch occurs if you beat the boss of this area, Warlord Viper, BEFORE getting all 6 Staff Pieces. If you fail to get all six before beating the boss, you'll have to get them all over again in the next quest, and there is a chance the game will give you a bad password that fails to relocate this Staff Piece to its proper resting place. Without it, you cannot break through Hadrian's Wall to reach the final area of the game, and you'll have to redo this quest all over again to get it. The moral of the story here is to make sure you get ALL six staff pieces before you fight the boss. Thanks to Mr. Strykolova for clarifying this issue.   5. From where the staff piece was, start following the trail south and don't stop. Leave the screen going south, and keep going south (you'll probably pass by some Rock Golem enemies). Don't stop until the trail goes off the screen. Instead of leaving the screen, turn west and start going west. Keep following the trail west until you see a farmer standing alongside the road. Talk to him. He wants the loaf of bread. Give it to him and he'll reward you with another Piece of Staff (3). Commentary time: If you talked to the farmer before getting the loaf of bread, he would tell you that he's lost and hungry and asks if you have any money or food. I absolutely love that instead of giving him some money, or maybe getting some fresh bread from the bakery in Crownhorn Village, Arthur finds a moldy old piece of bread lying on the ground that's half-eaten by birds and insects and gives it to him! Fan-frickin-tastic!  6. From where the hungry man is located, start going west and keep going until you end up at a wall of trees on the right side of the screen. Go north until you see a HUGE tree with a door on the front of it.  7. Enter the tree and you're in a room with a really big ogre. He wields a club, but sometimes he lays it down so he can throw rocks from the pouch he carries in his other hand. He can deal a lot of damage to you, so be careful, but he's generally not too tough to beat. If your knights don't follow you after him, then walk back down to where they are. This will lure the ogre down to them. With their help, he'll go down pretty quickly. He'll leave behind a Piece of Staff (4) so be sure to grab it.   8. Leave the tree, walk back over to the path, and start following it north. Go all the way until it forks, go east slightly, and then start going north again. Follow it all the way to the next screen. Go north some more and as soon as you see a break in the trees to your right, go through it. Follow the trail you come to south, and when it forks, start going east. Keep going straight east (ignore the trail when it curves up) and you'll eventually see a cellar door below you, nestled amongst some trees and surrounded by warlords. Kill the warlords and enter the door.  9. You are now in a castle basement. This is the first and only time a basement leads to two separate castles. Under all circumstances, you want to go to the LEFT castle first, which is Blackroot Keep. Follow these directions to get there: Go up to the wall, then go right all the way until you come to another wall. Go down a little bit and start going right again. As soon as you see a path going up, take it all the way into another wall. Then go left, and just keep following that pathway left until you come to a door.   10. Go through the door and follow the path. It only goes one way for awhile until you come to a huge open room with some warlords in it that has a passage going up and a passage going left. Take the lefthand passage for now. Follow it left all the way and you'll reach another door. Enter it.  11. From the door, start going left just a little bit and take the very first passage going up that you see. Follow it up to a wall, and then go left. Ignore the first two passages going up that you see and take the third one. Follow it all the way up to a staircase. Take the stairs and you'll be in Blackroot Keep. If you still have any trouble with this basement, refer to the Maps Section for help. 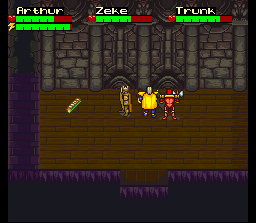 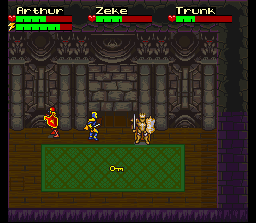 12. The path through Blackroot Keep is VERY straight-forward. Follow the one and only path through it and you'll eventually reach a room that has a Piece of Staff (5) in it. Get it and then continue following the path to the end where you'll find a room with Zeke's Key of Truth on the floor. If Zeke is still in your party, he'll grab it and you'll be warped back to Camelot Castle. If you still have any trouble getting through Blackroot Keep, refer to the Maps Section for help. 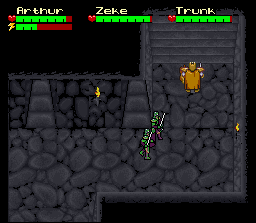 13. Make sure Trunk is still in your party and go ALL the way back to the castle basement and ALL the way back to that large open room with the warlords that has one passageway going up and one passageway going left, as mentioned in Step #10. This time, you will take the north passage. Follow it up the staircase and you'll end up in the Dark Citadel. 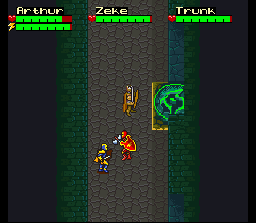  14. From the beginning of the Dark Citadel, go south one screen, then walk all the way left to the next screen. You're in a vertical hallway with some teleporters lining the right wall. Walk north and ignore the first two teleporters that you see and take the third one. This will put you in a room with the last Piece of Staff (6). Get it and exit the room.  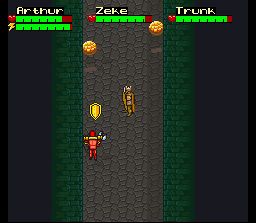 15. Go all the way back the way you came to the teleporter in the horizontal hallway that takes you to the starting point of the Dark Citadel. But instead of going into that teleporter, keep going right to the next one. Go up through that teleporter and keep going up. You'll eventually see Brick's Shield lying in the hallway. Get it.  16. Go north or south one screen past the hallway with the shield, and then exit through the right door. You're in a vertical hallway. Look for a teleporter in the middle of the right wall. That leads to the boss room, but make sure you heal Trunk before going in there! You will want him at full health for this fight! If you have any trouble getting through the Dark Citadel, refer to the Maps Section for help.   17. Warlord Viper is the first boss I can honestly say is somewhat difficult. You want to fight him as Trunk because Trunk has the best defense in the game, even better than Arthur's, and he'll take far less damage, especially from Viper's second form. The first form isn't too tough. Just avoid the giant snake as it weaves in and out of the columns to minimize damage. It's such a huge target that it's easy to strike several times before it leaves the screen. After so many hits, the snake turns into a warlord with the lower body of a snake. This form is considerably harder than the giant snake. Stand out-of-reach of his swords and hold X to charge up your sword to full power more quickly. Wait in the middle of the screen and as he's passing in front of you, rush in and swing your sword at him. As soon as it connects (or if you miss) immediately turn around and move out of his way again. It can be very difficult to get in hits of your own without getting nailed by his sword swipes. One way to lessen the chances of that happening is to abort your attack if he stops suddenly, or if he starts jerking back and forth. Only approach him if he's still moving continuously through the middle of the screen. Refer to the Boss Strategy for more help. Once you beat him, you'll get Trunk's Key of Truth and you don't even need to bring him back here to get it. But you are not quite done with this quest just yet...  18. When you warp back to Camelot, Merlin tells you that the reassembled Staff of Rhiothamus can break open a weak spot in Hadrian's Wall. You have all the staff pieces now, but how can you reassemble them? You need someone who is handy with building and fixing things, and that makes Tone perfect for the job. Go to the Round Table and put Tone in your party.   19. As soon as you leave Camelot, you'll get a cutscene in which Tone fixes the Staff of Rhinoceros...er, Rhiothamus. Arthur tells him to keep the staff and use it in battle. This is because the staff somehow turns into Tone's Shield. Tone also mentions that he heard an explosion and Arthur says it came from the direction of Morgana's Castle. You'll find out about that in the next quest, but for now...Congratulations! End of Quest #7.  |
BACK TO KNIGHTS OF JUSTICE SHRINE

![]()
