|
Publisher: MumboJumbo Developer: MumboJumbo Release Year: 2012
The third game in the Midnight Mysteries series has you solving the secrets of Mark Twain's past. You'll meet both real and fictional characters from his universe in this revisionist tale, and there's even a strange subplot involving William Shakespeare, Nikolai Tesla, and the demon Mephistopheles. Exploding steamboats and missing skeletons abound.

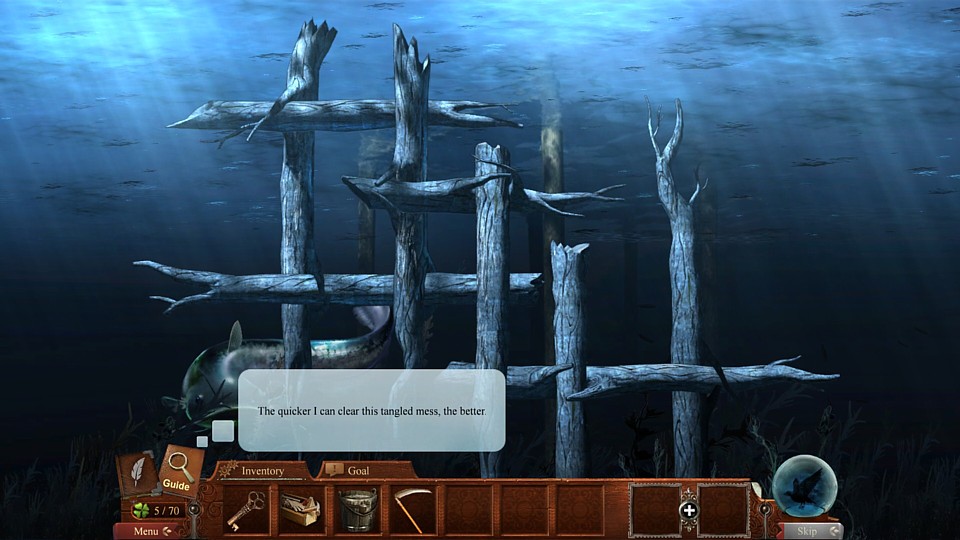
Type: Object Removal
Comment: The first puzzle is simple enough - pull away the branches until they're all gone. Some will not move before others are cleared first.
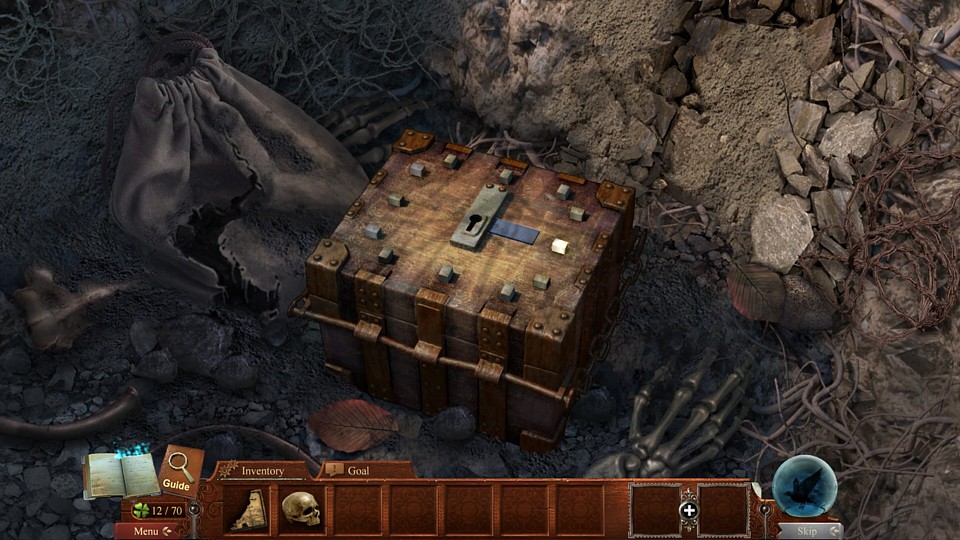
Type: Clock Puzzle
Comment: When you find all the pegs for this treasure box, it essentially becomes a clock puzzle. The clue to the correct times it needs to be set to are on a pile of books, but you can also use trial and error...or my guide. The first correct time is 3:00 (see screenshot), second is 12:00, third is 8:00, and fourth is 2:00.
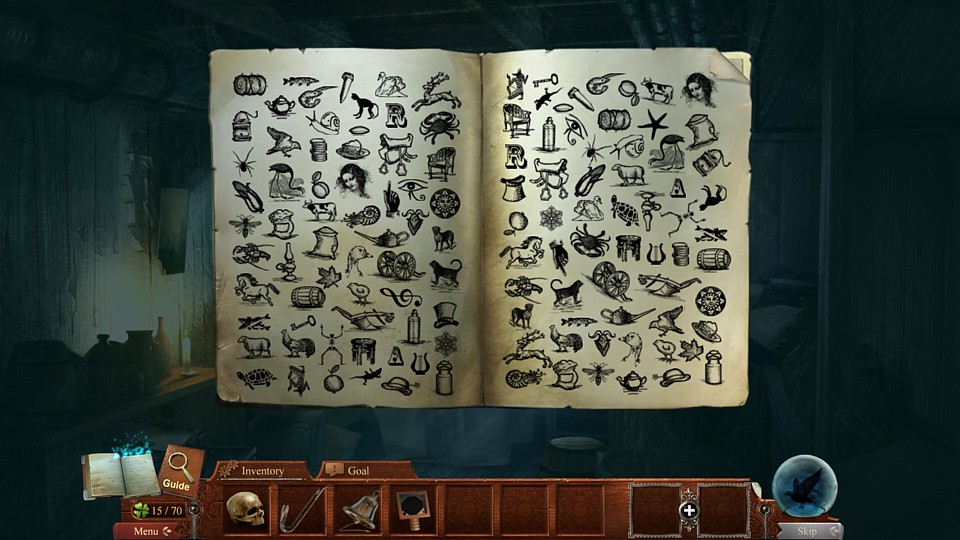
Type: Shape Matching Pairs
Comment: Click on matching pairs of pictures in this book until you are left with one unique symbol on each page. These symbols are the key to another puzzle. Here is the solution.
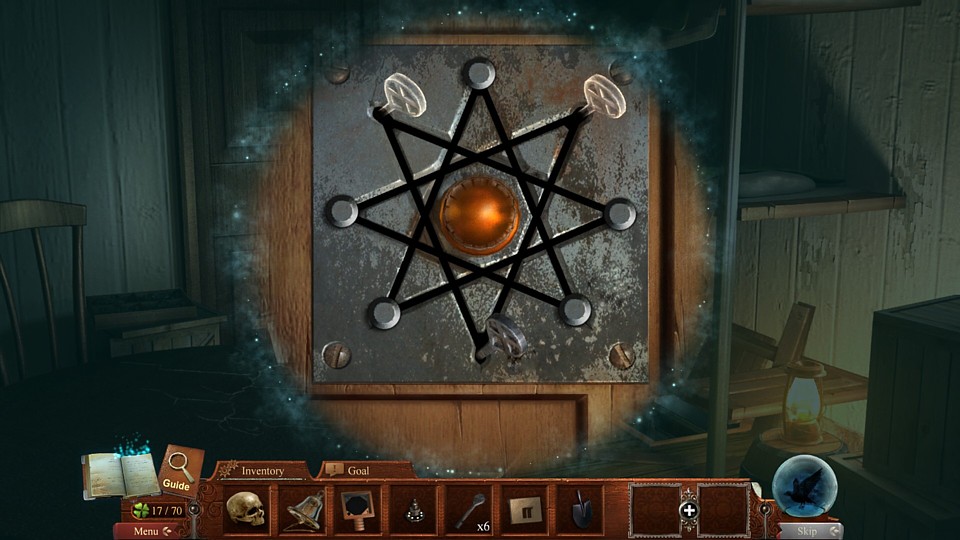
Type: Star Peg Puzzle
Comment: This is a puzzle that I've seen in other games, sometimes it uses a spider crawling on a web instead of keys on a star. You place a key on the star and the game will show you which possible nodes you can move it to. When you've made your choice the peg will be removed. Then you place the next key and move it, and keep repeating until you have no keys left. By the end, you want to have all pegs removed, but if you made a wrong move you won't be able to get them all the puzzle will reset. This is not very difficult and will probably take at most one or two tries to get it right.

Type: Tetris Blocks Physics Puzzle
Comment: This pain in the ass puzzle has you placing coal in the shapes of classic Tetris blocks on a platform. The stack must reach the top of the screen, but since this is also a physics puzzle, the coal pieces tend to fall and knock each other over. If a piece falls off the platform, the puzzle resets and you have to start all over again. Because of the random nature of the shapes that appear, there is no single "correct" solution to this and it simply requires a lot of trial and error, and a little luck that you don't get stuck with the "wrong" shape that you can't place anywhere without it messing up your whole stack.

Type: Clock Puzzle
Comment: This is what you needed the symbols from the book for. They decode the time needed for this watch. Set it to 4:00.
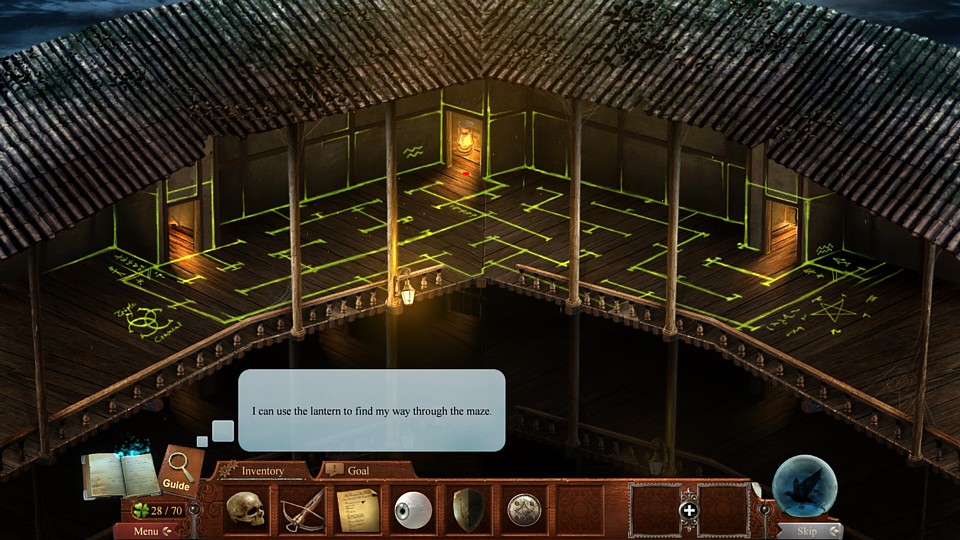
Type: Maze
Comment: Grab the lantern hanging in the middle doorway and move it through the maze on the floor to the other open door on the right, using its red shadow to determine where it's at. Try not to touch the walls of the maze, you'll be momentarily jolted if you do. There isn't really anything else to this except that you have to go through four mazes before you reach the exit.
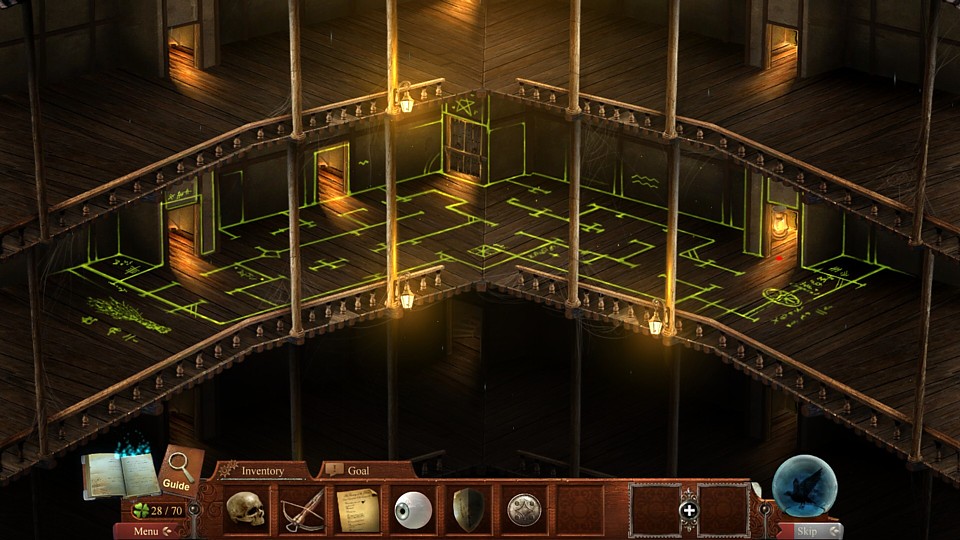
Maze #2: Move the lantern to the door all the way over on the far left.
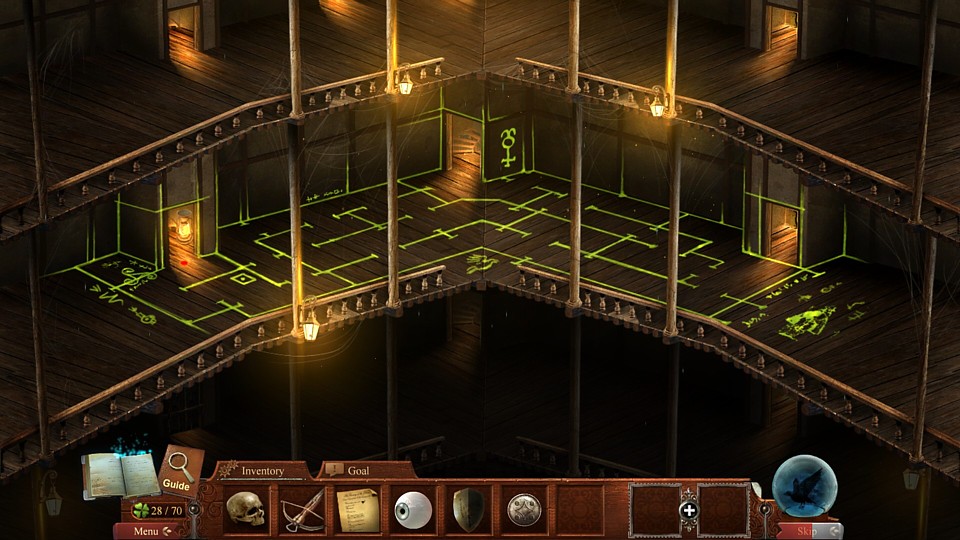
Maze #3: Take the lantern to the door in the middle.
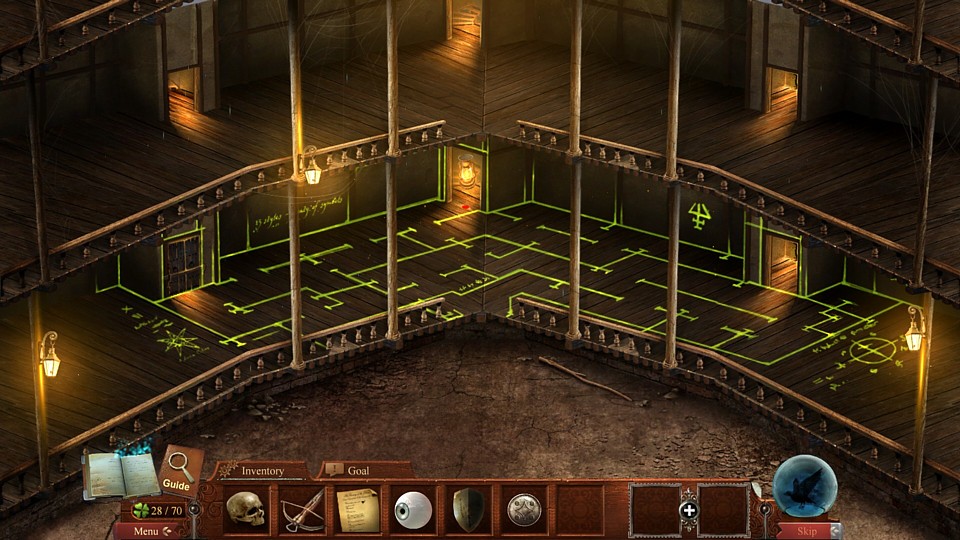
Maze #4: Ignore the doors and take the maze to the exit that leads to the ground in the bottom middle of the stage.

Type: Sudoku Lite
Comment: The trick to this Sudoku-inspired puzzle is that each square of 8 numbers must have one each of the numbers 1-8 in it. An additional catch is that any row or column of numbers not separated by a blank square cannot have more than one instance of the same number in it. If this is too confusing to figure out or if you just really hate Sudoku, here is the solution.

Type: Jigsaw Puzzle
Comment: Put the pieces of the William Shakespeare stained glass window back in place. Here is what it looks like solved.
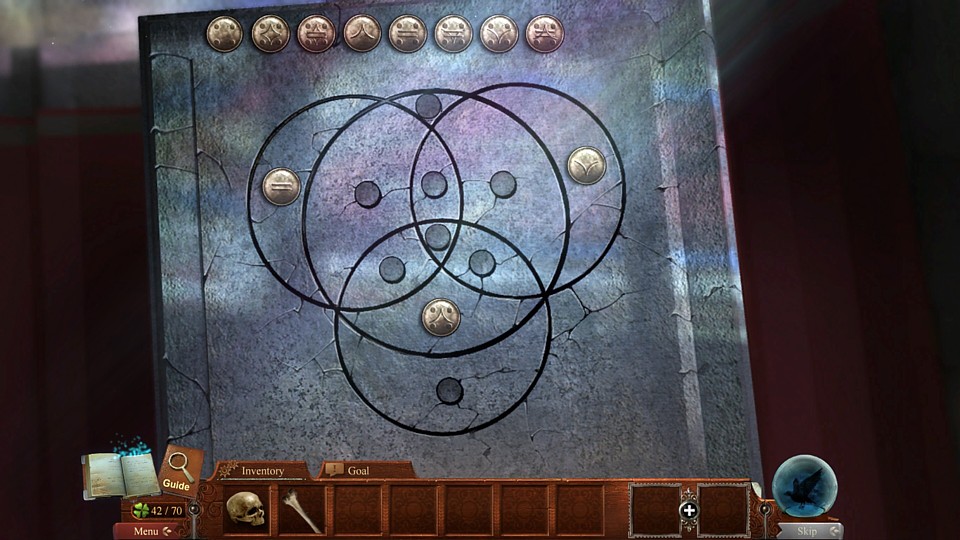
Type: Venn Diagram
Comment: Where a coin with a pattern exists in a circle in this puzzle, every coin within that circle must contain the same pattern. This Wikipedia page explains the Venn Diagram better than I can. If you find this too complicated and need the solution, here it is (last one not put in place yet because the quick screen transition wouldn't allow a screenshot). This puzzle can also be solved through trial and error because when you've placed all the coins, any that were placed in the correct spots will stay and the rest will be rejected. You can just keep trying until you have them all in the right spots.

Type: Correct Order/Sequence via Swapping Tile
Comment: If you don't know the secret of this puzzle you could spend forever trying to figure it out. The symbols on the tiles are actually mirrored numbers, which isn't obvious despite the "88". They must be placed in numerical order. Here is what it looks like solved.
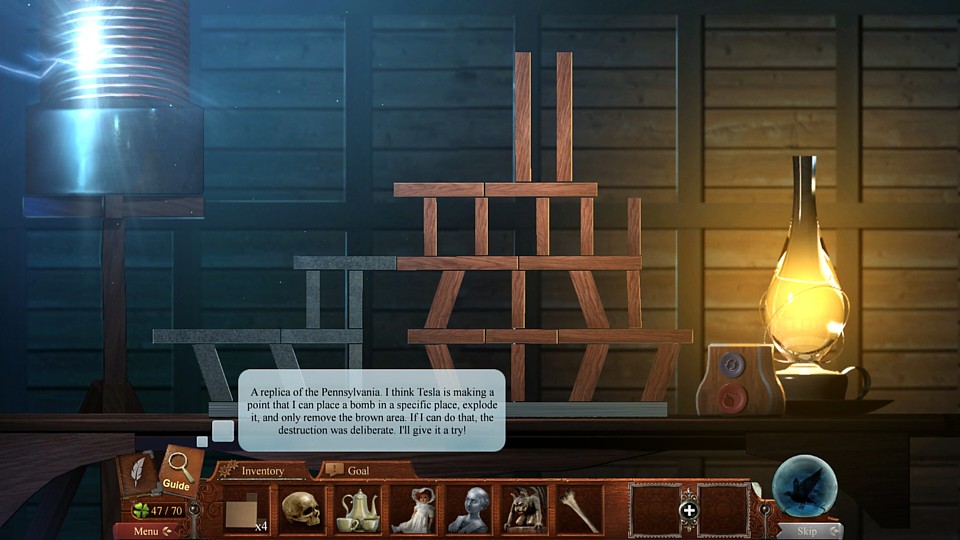
Type: Physics Puzzle
Comment: You have to place the bomb in the correct compartment of the model steamboat so that when it explodes, it takes down all the red planks with one blow. Here is the exact spot to put it.

Type: Jigsaw Puzzle
Comment: Replace all the missing floor tiles. They lock in place when they're in correctly, so this is very easy to solve.
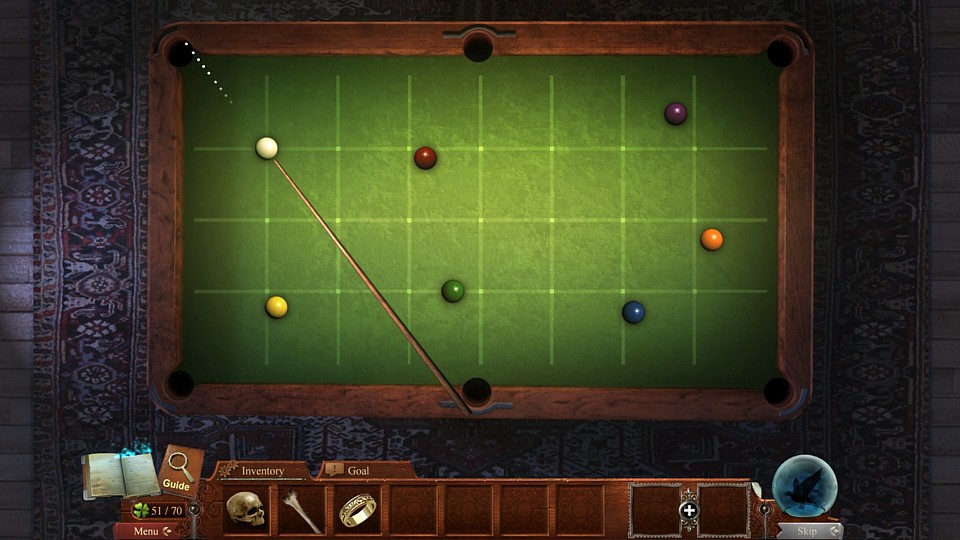
Type: Billiards Physics Puzzle
Comment: Knock all the balls into the holes. If you aim the cueball at the yellow ball below it first, it will get them all in one shot.

Type: On/Off Puzzle
Comment: All the skulls on this lock must face rightside-up, but turning some affects others.

Type: Battleship Mini-Game
Comment: This Battleship-inspired puzzle is a little difficult to understand, but I'll do my best to explain it. There are a total of 50 grid squares with a part of a battleship occupying them, per the number in the upper left. The upper right explains that there are 2 battleships that are 4 grid squares long, 3 that are 3 grid squares long, and 4 that are 2 grid squares long. To get an idea of where they are in the grid you look at the numbers on the sides. Take the column marked with a "44" for example. This means that there are two boats on this grid, each occupying 4 grid squares each. Logic dictates that the two battleships that are 4 grid squares long are somewhere along this column. Start firing the cannon to uncover them. Here is what this one looks like solved, but the placement of the ships is randomized so your solution may be different.
NOTE: If you're trying to get the Steam achievement for beating this puzzle without a miss, start by making a backup of your save before you begin the puzzle. Then use this guide for tips. The reason I tell you to back up your save is because when I tried this and missed, I exited the game and it crashed. I was not able to get into the mini-game again after that and had to restart from the beginning. If something like that happens, you can import your backup save into the folder and try again.

Type: Matching Colors/Shapes via Rotating Parts
Comment: When you push the button, the gears will turn. The colors and shapes that end up facing each other on the left and right of the gears must match up with the colors and shapes above. Swap the gears until you get them all in the correct positions. If this is too complicated to understand, then here is solution.

Type: Tetris Blocks Physics Puzzle
Comment: This is extremely similar to the earlier block-stacking physics puzzle, except that now the rocks aren't actually shaped like Tetris blocks, so they are much easier to stack. Get them to the top of the screen without them falling and you'll pass this annoying test.

Type: Pattern Matching Chains
Comment: Using the clues at the top and bottom of the puzzle, you must make a chain from one corner to the next. Start with the snowflake in the upper right corner. You must link it to a sun, then a snowflake, then a sun, and keep alternating like that until you reach the sun in the lower left corner. You must do the same to link the water drop and the leaf in the other corners. There may be more than one possible way to do this, but here is one solution that definitely works.

Type: Color Matching via Rotating Parts
Comment: Strangely enough, the main game's final puzzle is nearly identical to one from Samantha Swift and the Fountains of Fate. By rotating this puzzle board, the pieces inside will fall and group together. If three of more of the same type connect, they disappear. While I gave exact instructions for the Samantha Swift version in my guide, this one seemed even easier, so I don't think it's necessary. Just do it for all three and you're done. Reset the puzzle if the pieces get stuck and try again.

Type: Shape Matching Pairs
Comment: The first puzzle of the bonus chapter has you matching up spiderweb-like shapes on a pair of doors. At first glance, they all look alike, so you'll have to inspect them carefully to spot the minor details. Here's an example of a pair that matches. The rest are up to you.

Type: Matching Pairs
Comment: Use the magnifying glass to look for pairs of dollar bills that match. Since they are all very similar, the differences can be subtle and hard to spot. For example, one pair of bills has a 22 instead of a 25 (Figure 1). Another pair has some kind of brooch on George Washington's collar (Figure 2). Another pair has a backwards "S" on the end of "United States" (Figure 3). Two bills have a color that is slightly different from all the others, although this is difficult to notice in a screenshot (Figure 4). This will leave you with just one other pair to click on and end the puzzle (the difference in that pair is that the bills are lacking the design in the corners near Washington's head).
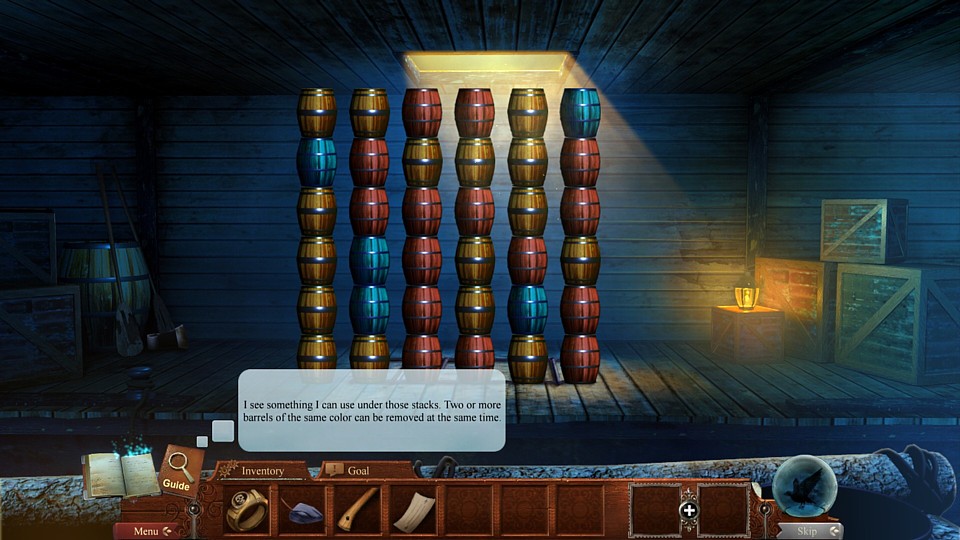
Type: Match 3
Comment: Once again, a puzzle is borrowed lock, stock, and barrel from Samantha Swift and the Fountains of Fate. When you click on a group of two or more barrels that are the same color, they disappear, and the remaining barrels shift into one pile. At the end, you must have all the barrels eliminated, but if any of a single color remain, more barrels drop down to refill the playing field. You just have to keep trying until you get them all. This puzzle can be really annoying, but I didn't have as much trouble with it as I did the one in Samantha Swift.
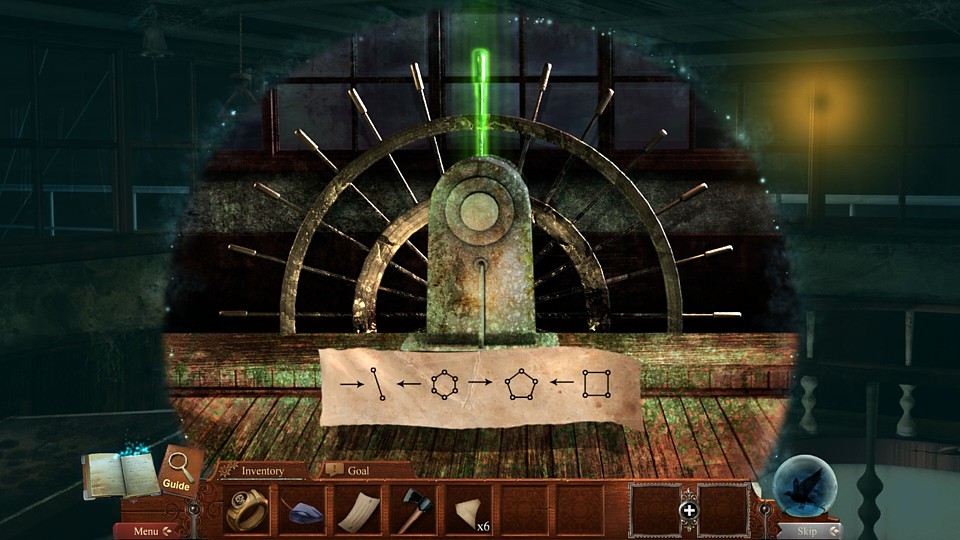
Type: Correct Order/Sequence
Comment: This, in my opinion, is the most confusing puzzle in the game. I sat staring at this puzzle forever trying to figure out how on earth it is possible to make those geometric shapes with this steering wheel, and even the solution in the guide made no sense to me. Well, let me tell you the secret: The shapes are a red herring, they don't matter at all. All that matters are the arrows and the number of circles on the shapes. Since the first clue is a right arrow and a line with two circles, you need to start at the glowing green spoke in the middle and move two to the right, the pull that spoke. Then go six to the left of the green spoke and pull that one. Then five to the right of the green spoke and pull it. Finally, go four to the left of the green spoke and pull.
Wanna know something strange? In trying to figure out this puzzle, I looked up an online guide. It looks like it was changed at some point. Originally it had symbols that equate to numbers on a keyboard. It seems like it may have been changed for being too difficult to figure out and yet it's still rather cryptic.
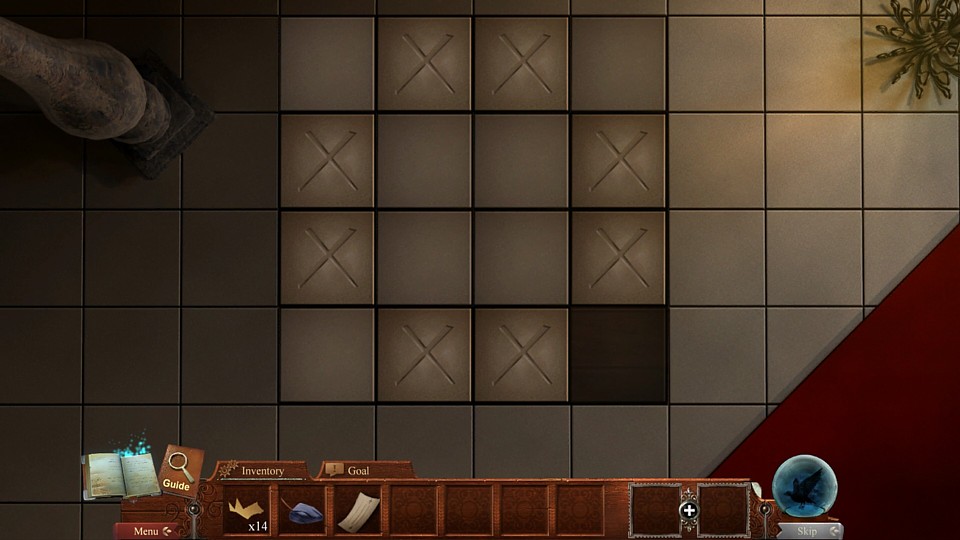
Type: Sliding Tile
Comment: All the X tiles on this sliding tile puzzle must be arranged in the shape of an X on the floor. Here is what it looks like solved.

Type: Jigsaw Puzzle
Comment: Put the pieces of the contract together. Here is what it looks like solved.
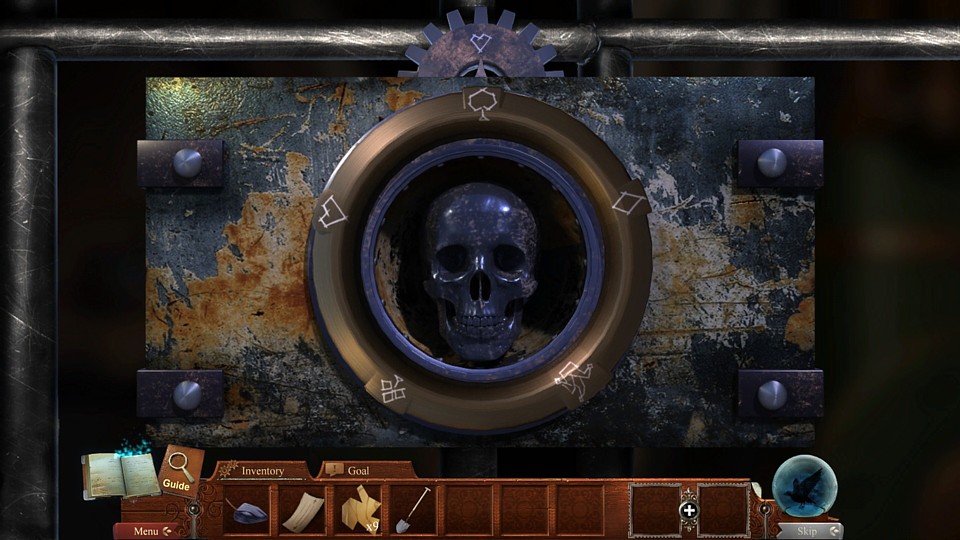
Type: Combination Lock
Comment: The bonus chapter's final puzzle is a two-parter. For the first half, simply turn the ring until the jester hat is on top. That'll open the outer lock.

The inner lock requires a combination. The answer is on the cards that are nailed to the nearby tree. Each card has one suit that isn't filled in solid and missing one spoke on the ship wheel. The gear at the top needs to be set to that "hollow" suit symbol, and then you must click the number or letter the missing spoke would represent on a clock. The answer is: Spade + A; Heart + 6; Club + 2; Diamond + 7.
|
