|
Publisher: MumboJumbo Developer: MumboJumbo Release Year: 2009
In her second adventure, Samantha Swift goes on an expedition to find her missing father and instead, ends up discovering the lost treasures of Midas, the king with the golden touch. Somehow or another, Jesse James is involved, and at one point you collect a bunch of animals and people that somehow get turned into constellations. Yes, this game series is pretty darn surreal.

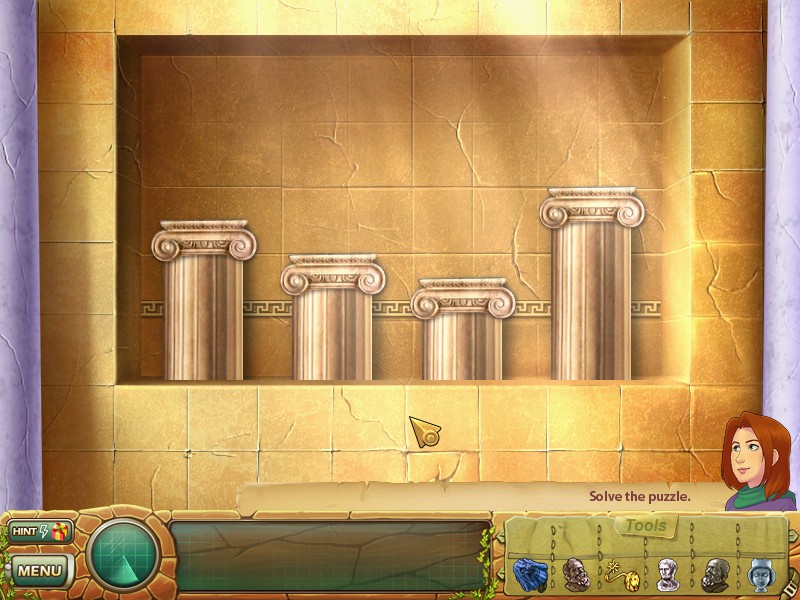
Type: Weight Balancing Puzzle
Comment: The four different busts you find in the same area as this puzzle must be placed on the pedestals. They each have a different weight, and the pedestals a different resistance. The heads must be placed on the pedestals so that they all descend to the same height. The pedestals turn yellow if you put the right head on top. Here is the puzzle solved.

Type: Jigsaw Puzzle
Comment: Assemble the mural when you've found all its missing parts. Here is the puzzle solved.
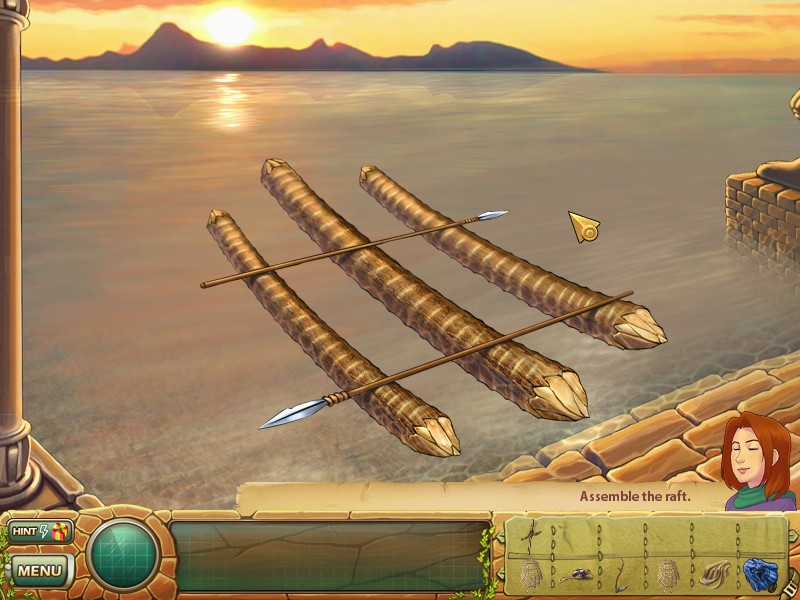
Type: Object Assembly
Comment: Put together a raft with stuff you find lying around the area. The game will only allow you to add pieces in a particular order. Here is what it looks like fully assembled.

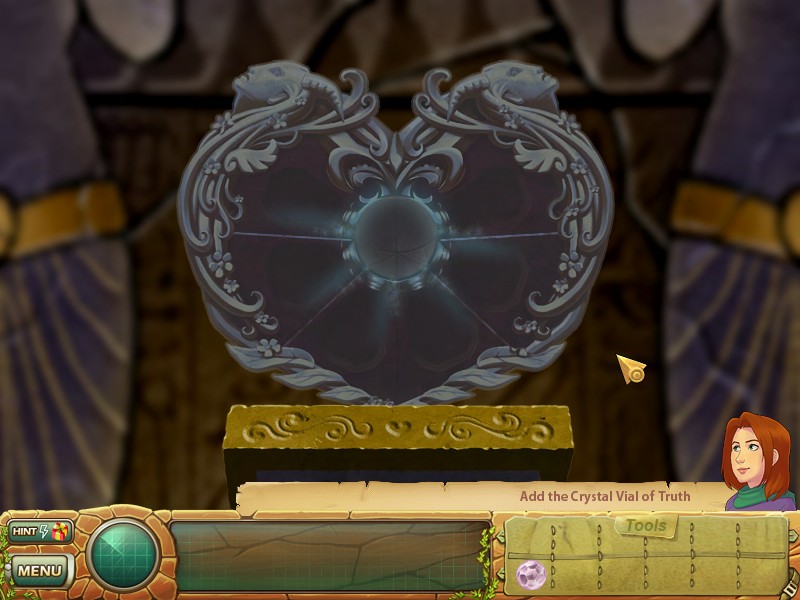
Type: Jigsaw Puzzle
Comment: Another jigsaw puzzle so soon after the mural. Put together the pieces of the Heart of Midas. Here is what it looks like solved. Put the crystal in the center to complete the scene.

Type: On/Off Puzzle
Comment: Clicking one knot will untie it and affect the others around it. They all need to be untied to progress. The first one shouldn't give you too much trouble.

When the first door is opened, you'll be confronted with another one. It's more of the same. Untie all the knots to proceed to the final door.

As complicated as this one looks, I'll tell you a little secret to solving it easily - always click the outermost corners first. When you untie a corner knot, the two next to it will disappear. Take out the four protruding corners first, and you'll be left with the square in the middle. Take out the square's corners and you're done.

Type: Matching Colors via Rotating Parts
Comment: The flowers in the four corners of this design must all be made one single color, according to the flower seen next to the corner. You do this by rotating the flowers to swap petals with the neighboring flowers. If you concentrate on one at a time, this is really rather easy. Here it is completely solved. Note that only the corner flowers matter - whatever colors the other flowers are left with doesn't affect anything.

Type: Sound Matching
Comment: When you push the buttons below the elephant statues, they will make an elephant trumpeting sound. You must match the same sounds from the statues on the left to the statues on the right or vice versa.

Type: Sliding Block Puzzle
Comment: This is very similar to a puzzle in the first Midnight Mysteries game. Slide the blocks around to reveal hidden keys underneath of them.

Once you have collected all the keys, you will need to use them for the second part of this puzzle.
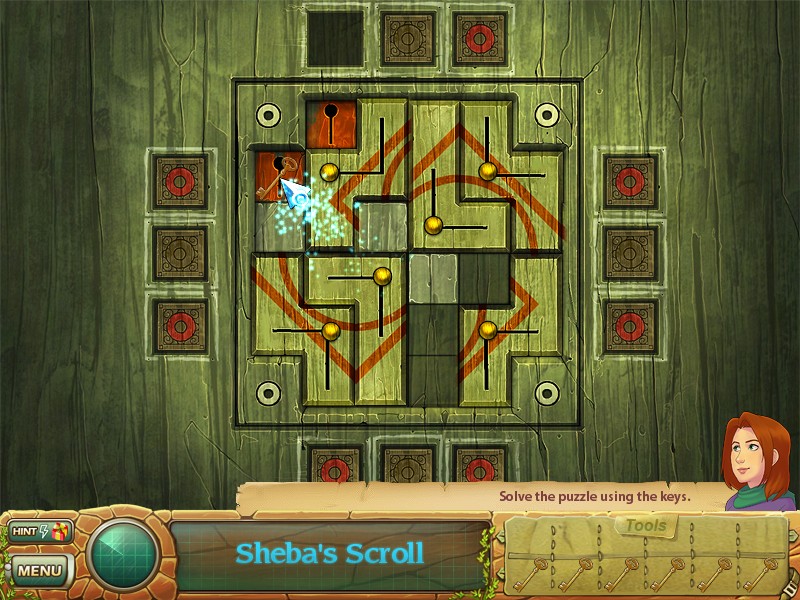
Slide the blocks around again to reveal the red keyholes. Use each key in a keyhole to make it and one of the red circle locks disappear. When they're all unlocked, you're done.

Type: Decoding Overlay
Comment: At this point of the game, use the map with the holes in your inventory and Samantha will hold it up in front of her. The holes match up with several red bricks in the surrounding walls. Click on each one to reveal a secret passage to the next area.
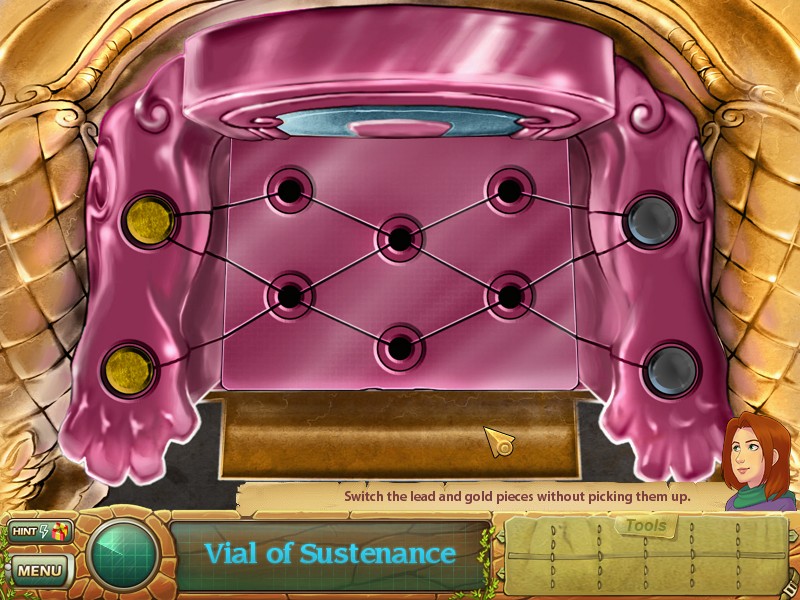
Type: Sliding Tile Node Variant
Comment: All you have to do here is get the lead and gold pieces to swap sides, and it's really easy to do.

Move one of each across at the same time and take advantage dual sets of nodes to slide them past one another.
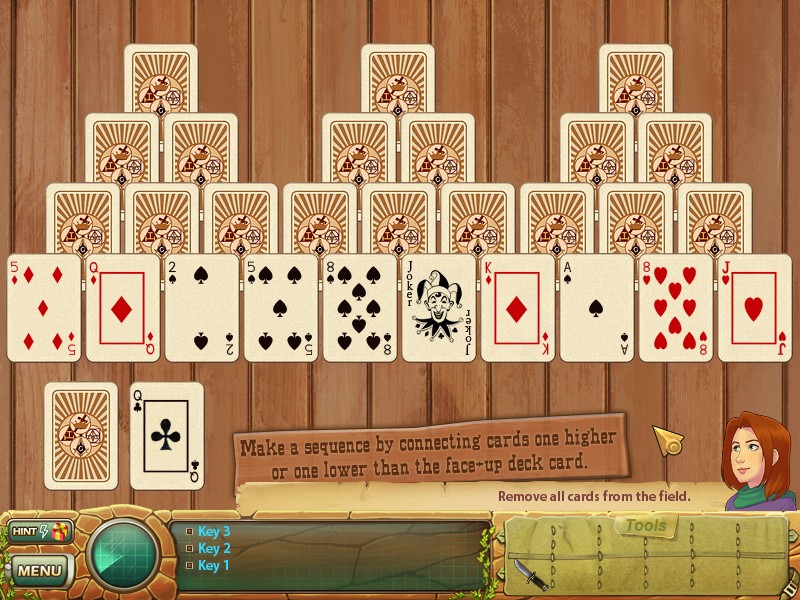
Type: Mahjong Variant
Comment: This same exact puzzle would eventually be reused as the final bonus chapter puzzle in Midnight Mysteries 4, except it's much easier here because there does not seem to be a limit to how many times you can turn over the deck. It's essentially a guaranteed win if you just keep at it.

Basically, you want to click on any card in the pile that is one higher or lower in value than the card on the deck. Jokers are wild and can be matched to any card. If you can't match the deck card to any card in the pile, you'll have to turn over a new card. As you clear the piles, you'll uncover hidden keys.

Type: Other
Comment: Rapidly shake your mouse left and right to make Samantha Swift shake the miner's pan and sift out the treasures she's looking for. When she finds the gold dust, dip it in the water and do it again for the Golden Branch.
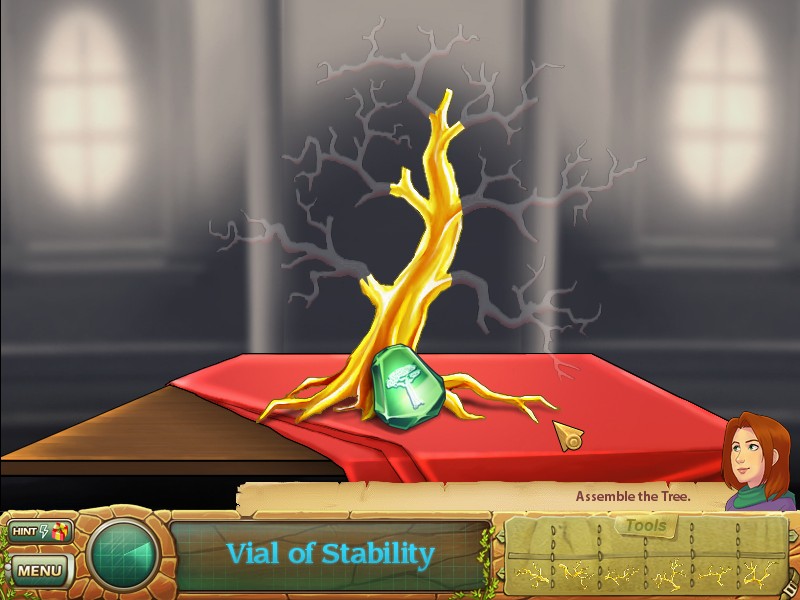
Type: Jigsaw Puzzle/Object Repair
Comment: Put together the pieces of the golden tree. It'll look like this when done.

Type: Matching Shapes/Lock Puzzle
Comment: Rearrange the teeth on the key so that they'll fit into the indents when you try to open the lock. Here is what it looks like solved.

Type: Object Removal
Comment: Click away all the boards that are blocking your path, always starting with the one on top.

Type: Mahjong
Comment: Click on a set of matching tiles to remove them. The catch is that they cannot be situated underneath another tile. This puzzle is a bit less forgiving than some of the others because if you run out of possible moves, it will reset. While using strategy can help prevent that situation, sometimes it can happen anyway because of the puzzle's random nature. Just keep trying until you've got it.

Type: Correct Order/Sequence
Comment: Each Stonehenge monument has a smaller rock next to it with one of the same symbols as the Mahjong tiles on the PDA to the left. Click them in the same order that the tiles show.

Type: Match 3
Comment: By clicking two adjacent chess pieces, you can momentarily swap them. If three or more of the same color line up as a result, they will vanish and destroy the blocks underneath. More chess pieces fall down to replace the ones that vanished. You need to do this until the entire chess board is gone.

When the board is cleared, the Queen piece will appear. Now keep matching three to move it to the bottom of the screen.

Type: Matching Shapes
Comment: Take each constellation and match it up to where it goes in the starfield. It is easiest to do if you connect them to the large colored stars. Many of them will need to be rotated to get into the proper position. It will look like this when solved. Note that the Bear and Dog appear upon solving the puzzle.

Type: Code Breaker
Comment: Use the stars in the dog constellation to figure out the secret code on the keyboard. While the correct keys are lit up, they must be pressed in a certain order. That order is: 7B6T5O9

Do the same with the bear constellation on this keyboard. The correct code is: FU73RT.
|


